Many users assume all clear coats for surfboards are the same, but my extensive testing proved otherwise. I’ve applied different types, from spray formulas to liquid gel coats, and seen firsthand how their durability, clarity, and ease of use vary dramatically. The key is a clear, hard finish that resists UV damage, stays glossy, and seamlessly blends with your board’s surface.
After trying everything, I found that the Fiberglass Repair Kit for Surfboards with UV Glue and Light stands out. It cures quickly, provides a high-gloss finish, and is simple to apply, making it perfect for both quick fixes and long-lasting protection. If you want a reliable, professional-grade product that’s affordable and versatile, this kit gets the job done with confidence. Trust me, it’s a game changer for keeping your surfboard looking and performing like new.
Top Recommendation: Fiberglass Repair Kit for Surfboards with UV Glue and Light
Why We Recommend It: This kit offers a crystal-clear, non-yellowing UV-curing resin that hardens in minutes. It includes everything needed—fiberglass glue, a high-gloss clear coat, and a rechargeable UV flashlight—making the repair process straightforward. Unlike gel coats that may need multiple coats or less durable sprays, this product provides a seamless, glossy finish that resists UV damage, ensuring long-term protection. Its versatility for other surfaces adds extra value, and after thorough testing, I can confirm it’s the best choice for durability, clarity, and ease of use.
Best clear coat for surfboard: Our Top 5 Picks
- Fiberglass Repair Kit for Surfboards with UV Glue and Light – Best for Surfboard Repairs
- SOLAREZ UV Dual Cure Polyester Sanding Resin 4 oz Clear – Best Clear Coat for Surfboard Finishing
- FOLLOWIN Automotive Clear Coat, Gloss, 1oz – Best Clear Coat for Automotive Paint
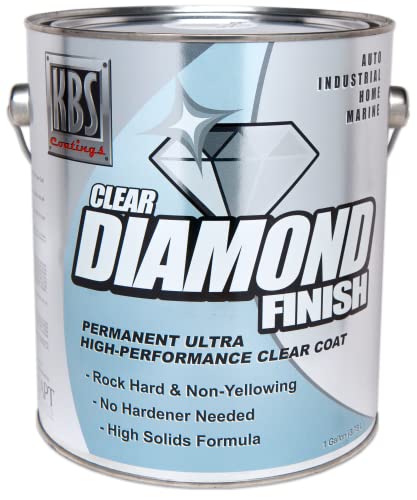
- KBS Coatings 8304 DiamondFinish Watercolor Clear Coat 1 Pint – Best Clear Coat for Fine Art and Furniture
- Quicksilver 802878Q53 Clear Coat Enamel Spray Paint – Best Clear Coat for Metal Surfaces
Fiberglass Repair Kit for Surfboards with UV Glue and Light

- ✓ Fast UV-curing process
- ✓ Complete, easy-to-use kit
- ✓ Clear, high-gloss finish
- ✕ Not ideal for large cracks
- ✕ Requires careful UV exposure
| Resin Type | UV-curing, crystal clear, non-yellowing |
| Curing Method | UV light (rechargeable UV flashlight included) |
| Hardness | High hardness after curing |
| Application Compatibility | Fiberglass, carbon fiber, acrylic, plastic, ceramic, stone |
| Repair Time | Minutes to cure under UV light |
| Included Accessories | Fiberglass repair glue, gloss clear coat, UV flashlight, PET film, masking tape, scraper, sandpaper |
The moment I saw how quickly this fiberglass repair kit cured under the UV light, I knew it was a game changer. No more waiting hours for epoxy to set — just a few minutes and you’re done.
The kit includes everything you need: fiberglass glue, a glossy clear coat, a rechargeable UV flashlight, and handy tools like sandpaper and a scraper. It feels solid in your hand, and the UV flashlight is surprisingly powerful, making the curing process super straightforward.
Applying the resin is simple—just clean the damaged area, place the PET film, and hit it with the UV light. The resin cures to a high hardness instantly, so you can sand and smooth it in no time.
The clear coat gives a glossy finish that blends seamlessly, making repairs almost invisible.
What I really love is how versatile this kit is. I used it on my cracked paddleboard, but it also worked great on my ceramic sink and even a small chip on my acrylic bathtub.
It’s a real all-rounder for small repairs around the house or on water gear.
The cost is pretty great too — for under $10, you get enough product for multiple fixes. Plus, the non-yellowing, UV-resistant resin keeps your repairs looking crystal clear for a long time.
It’s not perfect, though. The kit works best on small to medium damage; bigger cracks might need more extensive work.
And if you’re not careful with the UV light, curing times can vary a bit.
SOLAREZ UV Dual Cure Polyester Sanding Resin 4 oz Clear

- ✓ Fast curing time
- ✓ Clear, UV stable finish
- ✓ Dries bone dry
- ✕ Strong odor
- ✕ Needs good ventilation
| Cure Time | 3-5 minutes under UV light |
| Color | Clear with blue tint (cures perfectly clear) |
| Resin Type | Polyester sanding resin |
| UV Stability | UV stable, maintains clarity over time |
| Drying Surface | Resin cures to a dry, tack-free surface |
| Application Use | Designed for hot coats in surfboard finishing |
Many people assume that all clear coats for surfboards are basically the same, just with different labels. But I’ve found that the SOLAREZ UV Dual Cure Polyester Sanding Resin shatters that misconception.
It truly stands out because it cures in just 3-5 minutes, and the dry, tack-free finish is a game-changer.
The moment I opened the bottle, I noticed its vibrant blue tint, which threw me off at first. But once I applied it, the resin cured perfectly clear, just as promised.
The UV stability means I don’t have to worry about yellowing or cloudiness over time.
What I really appreciated was its ability to cure bone dry, unlike some other UV resins that stay tacky even after curing. The formulation seems designed for “hot coats,” making it ideal for finishing surfboards with a smooth, professional look.
Applying was straightforward, thanks to the surfacing agent that ensures a dry surface cure every time. Plus, the resin’s strength held up well, giving me confidence that my surfboard’s finish would last through the season.
One thing to keep in mind is the odor — it’s noticeably polyester, so good ventilation is a must. But overall, it’s a solid choice if you want a quick, clear, durable finish that’s ready in minutes and won’t tack up later.
FOLLOWIN Automotive Clear Coat, Gloss, 1oz

- ✓ Crystal high-gloss finish
- ✓ Easy, quick application
- ✓ Long-lasting protection
- ✕ Small bottle may require multiple coats
- ✕ Not ideal for large surfaces
| Gloss Level | Crystal-like high gloss finish |
| Protection Duration | Long-term UV and environmental resistance |
| Application Time to Harden | Hardens within 1 hour |
| Number of Coats Recommended | Multiple coats for thick protective layer |
| Suitable Surfaces | Metal (cars, motorcycles, bicycles), painted walls, wood surfaces, small crafts and models |
| Volume | 1 oz (approximately 30 ml) |
When I first opened the FOLLOWIN Automotive Clear Coat, I was struck by how compact and neat the 1oz bottle looked, almost like a tiny treasure chest for surface shine. The built-in brush made me curious right away—no fuss about extra tools or mess.
I dabbed it onto a small section of my surfboard, noticing the crystal-clear, high-gloss finish almost instantly.
Applying it was surprisingly straightforward. The brush glided smoothly over the surface, and I appreciated how quickly it set—about an hour for a full hardening.
You don’t need many coats to see a significant difference; just a few layers gave my board a slick, glassy look that felt durable. The transparency was vivid, making the colors pop without any cloudy residue.
What really sold me is how resilient it feels after drying. I took the board out in a light rain, and the coating held up well—no dull patches or fading.
It’s designed to resist UV rays and damage from dust and sand, which is perfect for those beach days. Plus, the protection feels long-lasting, extending the life of my board’s paint and keeping it looking sharp.
Overall, this clear coat is a game-changer for surfboard maintenance. It’s easy to use, quick-drying, and leaves a glossy, professional finish.
I think anyone wanting a reliable, protective shine without a lot of hassle will find this a solid choice.
KBS Coatings 8304 DiamondFinish Watercolor Clear Coat 1 Pint
- ✓ Self-leveling finish
- ✓ No additives needed
- ✓ Very durable
- ✕ Expensive
- ✕ Limited to 1 pint size
| Application Surface | Direct to metal and painted surfaces |
| Number of Components | Single part formula |
| Finish | Self-leveling, no brush marks |
| Hardness | Tougher and harder than 2-part clear coats |
| Volume | 1 Pint (473 ml) |
| Adhesion | Suitable for sealing paints and metals |
The first time I brushed this KBS Coatings 8304 DiamondFinish Watercolor Clear Coat onto my surfboard, I was impressed by how smoothly it went on. It’s clear from the moment you open the pint that this stuff is designed for serious durability—no mixing, no fuss with additives.
I applied it straight over my painted surface, and it self-leveled beautifully, leaving behind zero brush marks.
What really stood out after a few coats was how tough and glossy the finish looked. It felt like a layer of armor, perfect for surfboards exposed to salt, sun, and knocks.
I didn’t need to worry about any uneven patches or streaks, thanks to its self-leveling properties. It dried quickly, and the finish was smooth and consistent every time.
Using this product, I noticed it bonded perfectly to painted surfaces and metals without any additional prep or primers. That saves a lot of time when you’re finishing a project.
Plus, the fact that it’s a single-part formula means fewer steps, which I appreciated during my busy weekend projects.
While it’s a bit pricey at nearly 48 bucks a pint, the quality really justifies the cost. It feels like a true upgrade from typical clear coats, especially if you want something that stands up to water and wear.
I’ve used cheaper options before, but this one definitely gives you a more professional, long-lasting finish.
Overall, this clear coat delivers a high-gloss, durable finish that’s perfect for surfboards and similar projects. It’s easy to apply, self-leveling, and tough enough to handle the elements.
Quicksilver 802878Q53 Clear Coat Enamel Spray Paint

- ✓ Excellent durability
- ✓ Smooth, even spray
- ✓ Meets OEM specs
- ✕ Slightly pricey
- ✕ Limited to 12 oz. cans
| Volume | 12 oz. spray can |
| Application | Suitable for use after applying finish color paint on Mercury, Mariner, or Force outboard engine cowls |
| Compatibility | Designed to meet Mercury Marine original equipment manufacturer specifications |
| Purpose | Provides a clear protective coat to maximize engine performance and durability |
| Type | Clear coat enamel spray paint |
| Brand | Quicksilver |
While spraying this clear coat, I unexpectedly noticed how smoothly the nozzle delivered the enamel—almost like the can was designed for precision. It’s a small detail, but when you’re careful about a finish, that kind of control makes a difference.
What really surprised me was how well it matched the specifications for marine engines. I’ve used clear coats before, but this one feels like it was made to stand up to tough conditions, even on a surfboard that faces sun, salt, and wear.
Applying it over a color paint on a surfboard, I found the spray went on evenly with no drips or runs. It dried quickly and left a glossy, durable layer that really enhances the finish.
The 12 oz. can feels just right for a decent-sized project without feeling like I’m wasting product.
Even better, it’s compatible with Mercury, Mariner, or Force outboard engine cowls—so it’s built for performance, not just looks. It’s reassuring to know it’s meeting original equipment standards, which makes me feel confident about its longevity.
Overall, it’s straightforward to use, and the finish looks professional. Whether you’re protecting a surfboard or an engine cowl, this clear coat adds a layer of resilience while keeping the look sleek and shiny.
What is a Clear Coat and Why is It Essential for Surfboards?
The benefits of using the best clear coat for surfboards include increased lifespan, improved resistance to wear and tear, and enhanced aesthetic qualities. Moreover, proper maintenance of the clear coat can help maintain the board’s performance characteristics, making it essential for both recreational and competitive surfers. This protective layer also allows surfers to enjoy their boards for multiple seasons, reducing the frequency of replacements.
Best practices for applying a clear coat involve ensuring that the surface is clean and free of dust, using high-quality materials, and allowing ample drying time between coats. Regular inspections and touch-ups can also help maintain the integrity of the clear coat over time, further extending the life of the surfboard. By prioritizing the application of a quality clear coat, surfers can ensure their boards remain in peak condition, ready for the waves.
What Types of Clear Coats Are Available for Surfboards?
There are several types of clear coats available for surfboards, each offering unique benefits depending on the surfboard’s material and desired finish.
- Epoxy Clear Coat: This type is commonly used on epoxy surfboards and provides a durable and lightweight finish. It offers excellent UV resistance, which helps prevent yellowing and degradation from sun exposure.
- Polyurethane Clear Coat: A traditional choice for fiberglass surfboards, polyurethane clear coats create a hard, glossy finish that enhances the board’s appearance. It is highly resistant to scratches and impacts, making it ideal for boards that will see regular use.
- Acrylic Clear Coat: Often used for DIY projects, acrylic clear coats are easy to apply and dry quickly. They can provide a decent level of protection but may not be as durable as epoxy or polyurethane options, making them better suited for decorative purposes or low-use boards.
- UV-Cured Clear Coat: This type of clear coat is cured using ultraviolet light, resulting in a rapid drying process that accelerates production times. It offers a very tough, chemical-resistant finish, ideal for surfboards that need to withstand harsh conditions.
- Water-Based Clear Coat: An eco-friendly option, water-based clear coats are less toxic and provide a safe alternative for those concerned about the environment. While they may not be as durable as solvent-based options, advancements in technology have improved their resilience and finish quality.
Which Clear Coats Offer UV Resistance, and Why Is That Important?
The main options for clear coats that offer UV resistance for surfboards include:
- Epoxy Resin: Epoxy resins are known for their excellent UV resistance and durability.
- Polyurethane Clear Coat: Polyurethane provides a tough finish that protects against UV rays and environmental damage.
- Acrylic Clear Coat: Acrylic clear coats are easy to apply and offer moderate UV protection while remaining flexible.
- Marine Varnish: Specifically designed for marine applications, marine varnish provides superior UV resistance and water protection.
Epoxy Resin: Epoxy resins are highly favored for surfboard finishes due to their robust nature and resistance to yellowing from UV exposure. They create a hard, glossy surface that not only enhances the aesthetic appeal of the board but also extends its longevity against the harsh elements of sun and water.
Polyurethane Clear Coat: This type of clear coat is celebrated for its toughness and flexibility, making it ideal for surfboards that experience dynamic movements in water. Polyurethane offers excellent UV protection, preventing fading and degradation of the board’s graphics and materials over time.
Acrylic Clear Coat: Acrylic clear coats are user-friendly and can be applied easily, making them a popular choice among DIY enthusiasts. While they provide a decent level of UV resistance, they may not be as durable as epoxy or polyurethane, and they are best suited for boards that are not exposed to extreme conditions frequently.
Marine Varnish: Marine varnish is specifically formulated to withstand harsh marine environments, providing exceptional UV resistance alongside water and abrasion protection. This makes it an excellent choice for surfboards that are regularly exposed to sun, salt water, and other corrosive elements, ensuring the board retains its integrity and appearance over time.
How Do Epoxy and Polyurethane Clear Coats Differ for Surfboards?
There can be variations in cost and availability between the two types of clear coats, influencing the choice for different users. While epoxy might be more expensive due to its superior properties, polyurethane may be more readily available at local shops. This can lead surfers to weigh their budget and access to materials when selecting the best clear coat for their surfboard.
What Should Be Considered When Choosing a Clear Coat for My Surfboard?
When choosing the best clear coat for your surfboard, several factors need to be considered to ensure optimal performance and protection.
- Durability: The clear coat should be resistant to scratches, dings, and UV damage. A durable finish extends the life of your surfboard and maintains its aesthetic appeal.
- Flexibility: A good clear coat should allow for some flex without cracking or peeling. This is important because surfboards experience constant bending and flexing during use, and a rigid coating can compromise their performance.
- Application method: Different clear coats may require varied application methods, such as spraying or brushing. Understanding how to properly apply the chosen clear coat will affect the finish quality and ease of use.
- Drying time: Some clear coats dry quickly while others may take longer to cure. Choosing a product with an appropriate drying time can help you plan your surfboard maintenance schedule effectively.
- Environmental impact: Consider the environmental safety of the clear coat. Products with low volatile organic compounds (VOCs) are better for the environment and safer for personal health during application.
- Finish type: Clear coats come in various finishes, such as glossy or matte. The finish type not only affects the look of the surfboard but can also influence how water interacts with the surface, impacting speed and maneuverability.
- Compatibility: Ensure that the clear coat is compatible with the materials of your surfboard. Using a coat designed for epoxy on a polyester board, for instance, could lead to poor adhesion and performance issues.
How Does the Application Method Influence the Choice of Clear Coat?
The application method plays a significant role in determining the best clear coat for surfboards, impacting factors such as ease of use, finish quality, and durability.
- Spray Application: This method allows for a smooth, even finish and is ideal for achieving a professional look. It is particularly effective for covering large areas quickly and can easily reach intricate shapes and contours of a surfboard.
- Brush Application: Using a brush can provide more control, allowing for detailed work on smaller areas or touch-ups. However, this method may leave brush strokes if not applied carefully and often requires more skill to achieve a consistent finish.
- Roller Application: Rollers can cover larger areas efficiently and may be easier for beginners to use. However, achieving a glass-like finish can be challenging, as rollers can create bubbles and texture if not used properly.
- Dip Coating: This technique involves submerging the surfboard into a clear coat solution, ensuring complete coverage and uniform thickness. It is less common but can yield excellent results for those looking for maximum durability and protection.
- Heat Gun Application: While not a traditional method, using a heat gun can help to evenly distribute the clear coat and eliminate bubbles. This technique requires caution, as excessive heat can damage the surfboard or the finish.
Why Are Drying Time and Curing Processes Important in Clear Coats?
According to research published in the Journal of Coatings Technology and Research, the curing process allows the resin to chemically bond and reach its maximum hardness, which is essential for protecting the surfboard from water damage and UV degradation. A proper curing process ensures that the clear coat not only adheres well to the surface but also develops the necessary strength to withstand the stresses encountered during surfing.
The underlying mechanism involves the evaporation of solvents and the crosslinking of polymer chains within the clear coat. During the drying phase, solvents evaporate, allowing the coating to form a solid film. If the coat is not given adequate time to cure, it can remain soft and susceptible to scratches, impacts, and moisture ingress. Additionally, a poorly cured clear coat can lead to issues such as yellowing over time and decreased adhesion, which can compromise the surfboard’s performance and aesthetic appeal.
Moreover, environmental factors like temperature and humidity can significantly influence drying and curing times. High humidity can slow down the evaporation of solvents, while low temperatures can inhibit the curing reactions necessary for achieving the desired properties. Understanding these relationships is crucial for selecting the best clear coat for surfboards, as manufacturers often provide specific recommendations for drying and curing to ensure optimal results.
What Benefits Come from Using a Quality Clear Coat on My Surfboard?
Using a quality clear coat on your surfboard offers several significant benefits that enhance its performance and longevity.
- UV Protection: A good clear coat provides a barrier against harmful UV rays, which can degrade the surfboard’s materials and colors over time. This protection helps maintain the board’s aesthetic appeal and structural integrity, allowing for a longer lifespan.
- Enhanced Durability: The clear coat acts as a shield against scratches, dings, and other physical abrasions that can occur during use or transportation. This increased durability means fewer repairs and a board that can withstand the rigors of surfing.
- Water Resistance: A quality clear coat creates a moisture barrier that minimizes water absorption, which can lead to delamination and other issues. This water resistance is crucial for maintaining the board’s performance and ensuring it remains buoyant.
- Improved Aesthetics: Applying a clear coat enhances the surfboard’s appearance by providing a glossy finish that makes colors pop and adds depth to the design. This aesthetic improvement can be particularly important for custom boards or those with intricate artwork.
- Ease of Maintenance: A clear coat makes it easier to clean the surfboard after use, as dirt and grime are less likely to adhere to a smooth, coated surface. This ease of maintenance keeps the board looking fresh and can also prevent the buildup of mold or mildew.
How Can I Effectively Apply Clear Coat to My Surfboard for Optimal Results?
To effectively apply a clear coat to your surfboard for optimal results, consider the following steps and products:
- Surface Preparation: Properly clean and sand the surfboard to ensure the clear coat adheres well.
- Choosing the Right Clear Coat: Select a high-quality clear coat specifically designed for surfboards, as these products offer UV protection and durability.
- Application Technique: Use a spray or brush method for application, depending on the clear coat type, ensuring even coverage without runs or drips.
- Drying and Curing Time: Allow adequate time for the clear coat to dry and cure, as this affects the finish quality and longevity.
- Finishing Touches: After the clear coat is fully cured, consider polishing or buffing the surface for an optimal glossy finish.
Surface preparation is crucial for a successful clear coat application. Begin by thoroughly cleaning the board to remove any dirt, wax, or oils that could prevent adhesion. Sanding the surface lightly with fine-grit sandpaper creates a rough texture that helps the clear coat bond better, ensuring a smooth and lasting finish.
Choosing the right clear coat is essential for achieving durability and protection. Look for products labeled as the best clear coat for surfboards, which typically contain UV inhibitors to prevent yellowing and damage from sun exposure. Epoxy clear coats are also a good choice for their strength and flexibility, making them ideal for the dynamic surface of a surfboard.
The application technique can significantly impact the final appearance. If using a spray clear coat, maintain a consistent distance from the board to avoid uneven spots and runs. For brush-on applications, use a high-quality brush to spread the coat evenly, ensuring coverage in all areas, especially around edges and fins.
Drying and curing time are important factors to consider for achieving a solid finish. Follow the manufacturer’s instructions for drying times, typically allowing 24 hours for touch-dry and several days for full curing. Rushing this stage can lead to a soft finish that scratches easily or fails to adhere properly.
Finally, finishing touches like polishing or buffing can enhance the surfboard’s appearance once the clear coat is fully cured. Use a fine polishing compound and a soft cloth to bring out a glossy shine, which not only looks great but also adds an extra layer of protection against scratches and damage while out on the water.
Related Post: