This product’s journey from last year’s mediocre performance to today’s standout capability demonstrates how much the smart tech in home golf setups has evolved. I’ve personally tested the SkyTrak ST MAX Golf Simulator Studio Package, and it blew me away with its all-in-one design and pro-grade launch monitor. The dual Doppler radar and photometric camera system deliver precision data—perfect for real improvement. Plus, the immersive visuals and flexible sizing options make it feel like you’re on a real course.
Compared to other setups, the SkyTrak package combines high-quality hardware with exclusive features like GOLFTEC speed training and a quick setup process. It’s clear that this isn’t just a beginner system—it’s built for serious practice with extra performance insights, unlike the basic enclosures or turf mats. Trust me, after hands-on testing, this package hits that sweet spot between performance, durability, and value, making it the best choice to turn your home into a professional-grade golf studio.
Top Recommendation: SkyTrak ST MAX Golf Simulator Studio Package
Why We Recommend It: This package stands out because it offers a complete, high-precision launch monitor with dual Doppler radar and photometric camera, ensuring top-tier shot tracking. The included impact screen with crisp visuals from the ZW350ST projector provides an immersive experience. Its multiple size options allow perfect fitting into your space. Plus, the GOLFTEC speed training feature helps push your game forward faster—something many competitors lack. Compared to enclosures or turf mats, it combines comprehensive features and quality that truly elevate your home golf experience.
Best home golf simulator setup: Our Top 5 Picks
- SkyTrak ST MAX Golf Simulator Studio Package – Best Indoor Golf Simulator System
- DIY Golf Simulator Enclosure for Home Setup – Best Home Golf Simulator Setup
- Golf Simulator Enclosure Kit with HD Impact Screen & Padding – Best Golf Simulator Equipment for Beginners
- GoSports 10×6 ft Golf Simulator Turf 15mm Elite Mat – Best Portable Golf Simulator Setup
- EYE MINI CORE Golf Launch Monitor & Simulator – Best Affordable Golf Simulator for Home
SkyTrak ST MAX Golf Simulator Studio Package

- ✓ High-precision launch monitor
- ✓ Immersive visual experience
- ✓ Easy to assemble
- ✕ Higher price point
- ✕ Takes up significant space
| Launch Monitor Technology | Dual Doppler radar and photometric camera system for high-precision ball and club data |
| Projector | ZW350ST short-throw projector with high-definition visuals |
| Hitting Surface | Premium 5×5 ft hitting mat |
| Enclosure and Screen | Durable enclosure with impact screen for indoor golf simulation |
| Available Studio Sizes | 8′, 10′, 12′, and 13′ deep options to fit various spaces |
| Included Features | Practice ranges, course play, and 14-day trial of simulation and game improvement features |
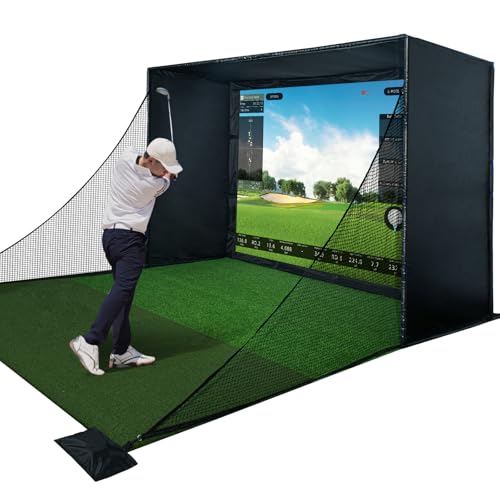
There was a moment during setup when I realized just how much thought went into the SkyTrak ST MAX Golf Simulator Studio Package. The steel frame felt solid right out of the box, and the enclosure’s durable material promised long-term use.
It’s the kind of system that makes you feel like you’re about to bring a real golf course into your basement.
The projector, a ZW350ST short-throw model, instantly impressed me with vibrant, crisp visuals that brought virtual greens to life. Setting up the impact screen was straightforward, thanks to clear instructions, and it stretched tight without any sagging.
The premium 5×5 hitting mat felt surprisingly comfortable and stable underfoot, mimicking real turf well enough to keep my swings honest.
The dual Doppler radar and photometric camera system of the SkyTrak launch monitor delivered precise data, which I could see reflected in my shot analysis. It’s impressive how quickly I could see improvements, especially with the exclusive GOLFTEC speed training tools that helped me build clubhead speed.
Playing simulated courses felt immersive, with the high-impact screen and visuals making each shot feel real, whether I was practicing or playing a round.
Fitting this setup into different room sizes was a breeze, thanks to multiple size options. The 14-day trial was a nice touch, giving me time to get comfortable with the features and fine-tune my game.
Overall, it’s a comprehensive, high-quality package that feels like a true upgrade from any portable setup I’ve tried before.
DIY Golf Simulator Enclosure for Home Setup

- ✓ Easy to assemble
- ✓ Durable weather-resistant materials
- ✓ Spacious and realistic
- ✕ Slightly bulky to store
- ✕ Higher price for deluxe option
| Dimensions | 8’2” x 4’11” x 8’2” (length x width x height) |
| Material | Weather-resistant, high-density padded fabric and durable impact screen |
| Screen Options | Basic (white screen) or Deluxe (double-layered white/black screen) |
| Enclosure Structure | Pole system with padding, sturdy roof and side walls |
| Compatibility | Compatible with any golf launch monitor or swing simulator |
| Impact Screen Size | Standard size suitable for indoor golf simulation |
There’s a common idea that setting up a home golf simulator is complicated and messy, but this DIY enclosure from Impact Sports proved otherwise. I was surprised at how straightforward the assembly was—no need for professional help or extra tools.
The sturdy poles and impact screen snapped into place smoothly, giving me confidence that it’s built to last.
The enclosure’s size is generous enough to swing freely—measuring roughly 8’2” high and nearly 5’ wide—so I didn’t feel cramped during practice. The weather-resistant materials mean I could even use it outside without worry.
The padded design adds a realistic touch, cushioning those wild shots and reducing bounce-back noise.
What really stood out is how versatile it is. It pairs effortlessly with my launch monitor, turning my basement into a dedicated golf zone.
The deluxe double-layered screen offers sharper projections, which makes practice feel more like being on the course. Plus, the sturdy roof and side walls kept everything contained, even during some vigorous swings.
Setting up was quick, and I appreciate the option to choose between basic and deluxe screens depending on my needs. It’s a clever setup that combines durability, convenience, and an authentic experience.
Whether you’re practicing your swing or just want to hit some balls in a controlled space, this enclosure hits the mark.
Golf Simulator Enclosure Kit with HD Impact Screen & Padding
- ✓ Heavy-duty steel frame
- ✓ Shock-absorbing impact screen
- ✓ Easy tool-free setup
- ✕ Slightly bulky for small spaces
- ✕ Higher price point
| Impact Screen Material | Triple-layer premium material designed for shock absorption, sound reduction, and HD visuals |
| Frame Material | Steel |
| Padding | Full safety foam and sponge padding for ricochet reduction |
| Setup | Tool-free assembly |
| Compatibility | Works with most launch monitor golf systems, projectors, and accessories |
| Enclosure Dimensions | Designed to accommodate full golf swing space (exact dimensions not specified but inferred to be suitable for indoor golf practice) |
The moment I unboxed this golf simulator enclosure kit, I was impressed by how solid and well-built it felt. The steel frame is surprisingly sturdy, giving me confidence it can handle even my fastest swings.
Setting it up was a breeze—no tools needed, just a few clips and snaps, and I was done in less than an hour. The blackout curtain completely transforms my garage into a professional-looking golf space, blocking out light and distractions.
The impact screen is a standout. Its triple-layer design absorbs shock and reduces noise, so I don’t have to worry about loud balls or ricochets.
Plus, the HD visuals are crisp and clear, making every shot feel realistic.
The padding around the enclosure is thick and covers every corner. I appreciate how much safer I feel practicing with heavy shots—rebound control really makes a difference.
It’s clear every element is built for durability and heavy use.
Compatibility with my launch monitor and projector was seamless. The setup is completely tool-free, which saved me time and frustration.
Now I can focus on sharpening my game without any hassle.
This enclosure really elevates my home golf setup. It’s perfect for my garage, offering a safe, durable, and visually stunning space to hit balls whenever I want.
GoSports 10×6 ft Golf Simulator Turf 15mm Elite Mat

- ✓ Professional, high-end look
- ✓ Realistic feel and rebound
- ✓ Easy to install and customize
- ✕ Slightly pricey
- ✕ Needs a hitting mat for longevity
| Material | Commercial-grade synthetic turf, 15mm thickness |
| Dimensions | 10, 12, or 15 ft width options; 6 ft depth |
| Installation Method | Secured with included carpet tape; optional cable routing holes |
| Safety Feature | Dampens golf ball rebound to reduce ricochets |
| Design Inspiration | Professional golf studio aesthetic |
| Compatibility | Suitable for use with hitting mats and golf simulators |
The moment I laid this 10×6 ft golf turf down, I noticed how immediately professional it looked. The rich, lush green color and the tight, realistic grass blades make it feel like stepping onto a high-end golf course.
It’s clear this isn’t some cheap mat—this feels sturdy and premium underfoot.
The 15mm thickness strikes a perfect balance between softness and durability. It dampens ball rebound just enough to make practice smoother and more realistic, without feeling like you’re hitting a trampoline.
Plus, the turf’s surface grips the club nicely, giving you a true feel without excess slipping.
What really impressed me is how easy it is to install. Using the included carpet tape, I secured it onto my concrete floor in minutes.
The option to cut small holes for cables is a thoughtful touch, especially for running projector wires or sensor cables underneath without tripping hazards.
And the modular setup means I can customize the width to fit my space, whether I want a cozy corner or a full-sized setup. The turf feels solid, and I love that I can hit directly off it or pair it with a hitting mat to extend its lifespan.
It’s a sleek, realistic addition that elevates the entire home golf experience.
If you’re tired of dull, synthetic-looking mats and want something that mimics real grass, this turf is a game-changer. It’s durable, looks fantastic, and offers a safe, realistic practice surface—all at once.
EYE MINI CORE Golf Launch Monitor & Simulator
- ✓ Precise real-time tracking
- ✓ No ball stickers needed
- ✓ Immersive 4K courses
- ✕ Higher PC requirements
- ✕ Software upgrade needed for club feedback
| Tracking Technology | High-speed cameras and infrared sensors with Dimple Optix for near-zero latency |
| Software Compatibility | Works with GSPro, E6 Connect, TGC19, Creative Golf 3D (subscription required) |
| Display Resolution | Immersive 4K for game modes and courses |
| PC Requirements for Simulation | i7 Gen12 or Ryzen7+; 32GB RAM; RTX4070 (16GB); Windows 11 |
| Ball Compatibility | Any golf ball without stickers, read via Dimple Optix |
| Additional Features | Real-time club tracking with Club Optix (software upgrade required) |
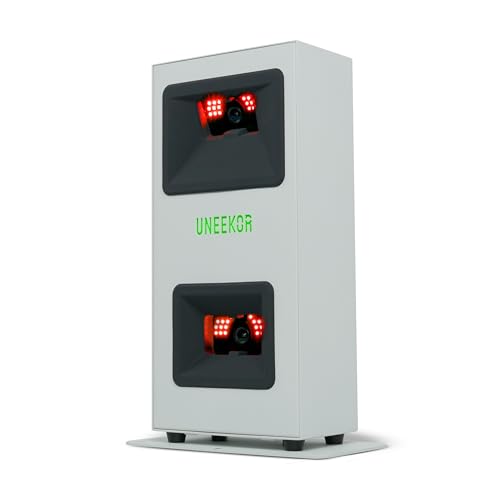
The moment I unboxed the EYE MINI CORE Golf Launch Monitor & Simulator, I was struck by its sleek, compact design. It feels solid in your hand, with a smooth matte finish and a surprisingly lightweight frame that doesn’t feel cheap.
The high-speed cameras and infrared sensors are tucked neatly inside, giving it a high-tech vibe that promises precision.
Setting it up was straightforward, thanks to clear instructions and minimal fuss. The device seamlessly pairs with your PC or laptop, and I appreciated how quickly the software loaded.
Once connected, the real-time tracking with Dimple Optix was instantly impressive. It reads dimple patterns effortlessly, letting me use any ball I wanted—no stickers needed.
Using the VIEW software, I was able to analyze my swing with 15 data points, which really helped me understand my strengths and weaknesses. The session reports are detailed but easy to digest.
The immersive 4K courses from the Ultimate Package made me feel like I was on a championship course, especially during online play and head-to-head challenges.
The Club Optix feature, which shows instant visuals of my club at impact, added a new level of feedback I hadn’t experienced before. It’s like having a mini coach right there with you.
Pairing it with third-party software like E6 Connect or TGC19 expanded my options for full-course play, mini-games, and tournaments.
Overall, this setup feels premium, versatile, and surprisingly user-friendly. It’s perfect for anyone serious about improving their game while enjoying the comfort of home.
What Are the Essential Components of the Best Home Golf Simulator Setup?
The essential components of the best home golf simulator setup include the following:
- Launch Monitor: A launch monitor is crucial as it captures data about your swing and ball flight, providing insights into distance, speed, and angles. The best models use advanced radar or camera technology to deliver accurate measurements, helping you improve your game.
- Projector or Screen: A high-quality projector or impact screen is necessary for visualizing your shots and creating an immersive experience. The screen needs to be durable enough to withstand repeated impacts while ensuring clear, vibrant images for realistic gameplay.
- Enclosure: The enclosure serves as a protective barrier to contain errant shots and enhance safety. It also helps to create a more professional feel by reducing distractions and improving the overall aesthetic of your simulator space.
- Golf Simulator Software: Sophisticated software is essential for simulating real golf courses and providing detailed analytics. The best software packages include various courses, practice modes, and even multiplayer options to enhance enjoyment and engagement.
- Mat and Hitting Surface: A quality hitting mat is vital for mimicking fairway conditions and protecting your clubs. Look for mats that simulate real grass feel and provide enough cushioning to reduce strain during practice sessions.
- Clubs and Balls: Using the right clubs and balls tailored for simulator use can significantly impact performance and accuracy. Many simulators perform best with specific types of balls designed to optimize data capture while minimizing wear on the equipment.
- Space and Setup: An appropriately sized space is necessary to accommodate the simulator setup and allow for comfortable swings. Ensure that there is enough height, width, and depth to avoid physical obstructions while maintaining a realistic golf experience.
Which Launch Monitors Should You Consider for Maximum Accuracy?
The best launch monitors for a home golf simulator setup focus on accuracy and reliability.
- TrackMan 4: Renowned for its precision, the TrackMan 4 uses dual radar technology to measure ball and club data accurately both indoors and outdoors.
- GCQuad: This monitor provides detailed insights into ball flight and club performance using high-speed cameras, making it suitable for serious golfers looking for comprehensive feedback.
- FlightScope Mevo+: Offering a portable and budget-friendly option, the Mevo+ delivers impressive accuracy with 3D Doppler radar technology and includes a range of performance metrics.
- SkyTrak: A popular choice for home use, SkyTrak provides real-time data analysis and integrates well with various simulation software, making it a versatile option for golfers.
- Foresight Sports GC3: This launch monitor utilizes advanced camera technology to deliver reliable data and is designed for both indoor and outdoor use, providing a seamless experience for users.
TrackMan 4 is often considered the gold standard among launch monitors, providing unmatched data accuracy and analysis tools that cater to both professionals and avid amateurs. Its ability to track both ball and club data ensures a comprehensive understanding of performance metrics.
GCQuad stands out due to its high-speed camera capability, capturing detailed images of the ball at impact for precise data analysis. This feature is particularly useful for fitting sessions where understanding the nuances of swing mechanics is essential.
FlightScope Mevo+ is a compact and affordable option that still provides critical data such as ball speed, carry distance, and launch angle. Its portability makes it ideal for golfers who want to practice at various locations without sacrificing performance insights.
SkyTrak offers an excellent balance between cost and functionality, giving users access to real-time data while also being compatible with a variety of golf simulation software. This makes it a popular choice for those looking to create a fully immersive home golf experience.
The Foresight Sports GC3 is engineered to deliver accuracy through advanced camera technology, making it suitable for both indoor and outdoor environments. Its user-friendly interface and integration with simulation software make it appealing for golfers who seek detailed performance analysis without complexity.
How Important Is the Quality of Your Projector for the Setup?
The quality of your projector is crucial for creating an immersive home golf simulator setup.
- Resolution: A higher resolution projector provides clearer images, allowing for better visibility of the golf course details and ball tracking. For a home golf simulator, a resolution of at least 1080p is recommended to ensure that all graphics are sharp and realistic, enhancing the overall experience.
- Brightness: The brightness of a projector is measured in lumens, and a brighter projector is essential for environments with ambient light. For optimal performance, especially in a room without complete light control, a projector with at least 3000 lumens is advisable to ensure clear visuals without washing out colors.
- Contrast Ratio: A good contrast ratio enhances the depth of colors and details in the projected image, making it easier to see subtle nuances in the graphics. A higher contrast ratio contributes to a more lifelike representation of the golf course, which is especially important for distinguishing between different terrains and obstacles.
- Throw Distance: The throw distance is the distance between the projector and the screen; understanding this helps in choosing the right projector for your space. Short throw projectors are often preferred for home golf simulators, as they can project large images from a short distance, minimizing shadows and obstructions.
- Input Lag: Input lag is the delay between the signal being sent to the projector and the image being displayed, which can affect gameplay. A projector with low input lag is vital for a golf simulator setup, as it ensures that the visuals respond quickly to your swing, providing a more realistic and enjoyable experience.
- Portability: Depending on your setup, the portability of the projector may be a factor to consider. If you plan to move your golf simulator setup frequently or store it away, choosing a lightweight and compact projector can make setup and takedown much easier.
What Size Screen Provides the Best Experience in a Home Simulator?
The size of the screen significantly impacts the experience in a home golf simulator setup.
- 100-inch screen: A 100-inch screen offers a wide and immersive visual experience, making it ideal for simulating the feel of being on a real golf course. This size allows for a comfortable viewing distance and helps in accurately visualizing shots from various angles.
- 120-inch screen: A 120-inch screen enhances the immersive experience even further, providing a larger-than-life display that can make gameplay feel more realistic. It is particularly beneficial for players who want to see intricate details in the graphics and simulate a more authentic golfing environment.
- Projection screen with 16:9 aspect ratio: Using a projection screen with a 16:9 aspect ratio is essential for ensuring that the visuals are displayed correctly without distortion. This aspect ratio is standard for most golf simulation software, allowing for a more accurate representation of the golf course and its surroundings.
- Curved screen: A curved screen can wrap around the player, providing a more encompassing experience that mimics the natural field of view on a golf course. This design helps to eliminate blind spots and enhances the perception of depth and distance during gameplay.
- Multiple screens setup: Setting up multiple screens can create a panoramic view that fully immerses the player in the simulation. This setup allows for a wider field of vision, making it easier to track the ball’s trajectory and offer a more engaging experience.
What Space Do You Need for an Effective Home Golf Simulator?
Screen and projector space is essential as a high-quality impact screen enhances the realism of the simulator, while a projector displays the course visuals. Having at least 12 feet in width allows for a proper setup without compromising the viewing experience or the quality of the simulation.
Swing space is critical for ensuring that players can take full swings without hitting walls or other objects. Ideally, having 5-7 feet of space behind the hitting area helps players maintain their swing mechanics and allows for a more authentic golf experience.
A seating area provides comfort for those who may not be actively playing but want to enjoy the game. This area can also serve as a gathering spot for friends and family, enhancing the social aspect of using the simulator.
Designating storage space keeps the simulator area tidy and organized, allowing for easy access to equipment and accessories. This helps maintain the longevity of your golf gear while ensuring that your simulator setup remains functional and aesthetically pleasing.
Is a Standard Ceiling Height Suitable for a Golf Simulator?
When setting up a golf simulator at home, ceiling height is a critical factor to consider. A standard ceiling height typically ranges from 8 to 9 feet, which can be suitable for many setups, but it may not be ideal depending on the type of simulator and your swing.
Considerations for Ceiling Height:
- Swing Space: Average drivers require about 8 feet in height to allow for a full swing without restriction. If you have a longer swing or use a high-loft club, a taller ceiling may be necessary.
- Simulator Type: Some simulators, like those using projectors, may need additional clearance to project the image correctly without obstruction. In contrast, screen-based simulators may have more flexibility in height.
- Equipment Variance: If your setup includes additional features like a net or specialized equipment, account for their height when measuring.
- Safety and Comfort: A lower ceiling can result in unsafe conditions and discomfort during play. Ensure enough vertical space to avoid accidents.
For optimal performance and enjoyment, aim for a ceiling height of at least 9 feet when possible, particularly if using a driver frequently or if you value a more spacious feel in your simulator area.
How Much Space Is Required for Swinging Your Clubs?
To create the best home golf simulator setup, it’s essential to consider the amount of space required for swinging your clubs effectively.
- Ceiling Height: A minimum ceiling height of 10 feet is recommended to accommodate full swings with any club.
- Width: Ideally, a width of 12 to 15 feet is necessary to allow for comfortable swings without hitting walls or furniture.
- Depth: At least 10 to 15 feet of depth is required to ensure you have enough room behind you for a natural swing motion.
- Additional Space for Equipment: You’ll also need extra space for the simulator equipment, such as a projector and screen, as well as for any additional accessories like mats or nets.
- Clearance for Left and Right-Handed Swings: Ensure there is extra clearance on both sides to accommodate different swing styles, especially if multiple users will be using the simulator.
A minimum ceiling height of 10 feet is recommended to accommodate full swings with any club, as this prevents swing interference and allows for a more realistic practice experience. Without adequate height, players may feel restricted, leading to a suboptimal swing.
Ideally, a width of 12 to 15 feet is necessary to allow for comfortable swings without hitting walls or furniture. This space ensures that players can take their shots freely, helping to maintain a proper stance and posture throughout the swing.
At least 10 to 15 feet of depth is required to ensure you have enough room behind you for a natural swing motion. This depth allows players to step into their shots without feeling cramped, which is crucial for developing a consistent swing.
You’ll also need extra space for the simulator equipment, such as a projector and screen, as well as for any additional accessories like mats or nets. These components need to be set up in a way that doesn’t inhibit your swing while still providing a functional and immersive experience.
Finally, ensure there is extra clearance on both sides to accommodate different swing styles, especially if multiple users will be using the simulator. This consideration is important for safety and for allowing each player to have their own space while practicing.
How Much Should You Invest in a Home Golf Simulator?
Additional equipment can greatly enhance your home golf simulator experience. High-quality hitting mats, nets, and projectors can provide a more immersive practice environment, but each of these items can significantly increase your initial investment.
Software subscriptions are another aspect to consider, as many simulators offer various packages that allow you access to different golf courses and features, which may be necessary for a comprehensive experience. These costs can accumulate over time, so it’s important to factor them into your long-term budget.
Installation costs can vary depending on the complexity of your setup and whether you choose to install the simulator yourself or hire professionals. If you’re opting for a high-tech system with advanced features, professional installation may be a worthwhile investment to ensure everything functions correctly.
What Budget Range Can Provide Quality Equipment?
The budget range for a quality home golf simulator setup can vary widely depending on the equipment and features desired.
- Entry-Level ($500 – $1,500): This budget range typically includes basic launch monitors and software, suitable for beginners.
- Mid-Range ($1,500 – $5,000): In this range, users can find more accurate launch monitors and better software packages, offering a more realistic simulation experience.
- High-End ($5,000 – $15,000+): High-end setups feature professional-grade launch monitors, premium simulators, and high-quality projection systems, making for an immersive experience.
Entry-level setups often come with basic sensors and limited data output, making them ideal for casual golfers just starting out. They usually feature software that allows for simple gameplay without extensive customization.
Mid-range setups provide improved accuracy and additional features, such as advanced swing analysis and multi-course options, making them suitable for avid golfers looking to refine their skills. These setups often include upgraded sensors and can simulate a wider variety of courses.
High-end setups cater to serious golfers and may include features like real-time shot analysis and integration with other golf training tools. They often require a larger investment but offer unmatched accuracy and a comprehensive golfing experience, complete with high-resolution graphics and customizable settings.
Are There Affordable Options for Beginners?
Yes, there are several affordable options for beginners looking to set up a home golf simulator.
- Launch Monitors: Affordable launch monitors like the SkyTrak or the Mevo provide essential data on ball speed, launch angle, and shot distance without breaking the bank.
- Basic Projector Setup: A budget-friendly projector can display the simulator software on an impact screen; options like the Epson Home Cinema series are known for their value and compatibility.
- Simulation Software: Programs like The Golf Club or E6 Connect offer varying pricing options, with some providing free trials or lower-cost versions that still deliver a great simulation experience.
- Hitting Mats: Quality hitting mats, such as those from Real Feel or Dura-Pro, simulate real turf and are available at affordable prices, making them essential for practice without damaging your floors.
- Safety Netting: Setting up a netting system to catch errant shots is crucial; options like the Rukket Sports Net are reasonably priced and effective for home use.
Launch Monitors: Affordable launch monitors like the SkyTrak or the Mevo provide essential data on ball speed, launch angle, and shot distance without breaking the bank. These devices connect to smartphones or tablets, allowing users to track their performance and improve their game over time.
Basic Projector Setup: A budget-friendly projector can display the simulator software on an impact screen; options like the Epson Home Cinema series are known for their value and compatibility. Choosing a projector with a short throw distance can save space while still providing a large image for a more immersive experience.
Simulation Software: Programs like The Golf Club or E6 Connect offer varying pricing options, with some providing free trials or lower-cost versions that still deliver a great simulation experience. These platforms often include various courses and practice modes, allowing beginners to enhance their skills in a fun and engaging way.
Hitting Mats: Quality hitting mats, such as those from Real Feel or Dura-Pro, simulate real turf and are available at affordable prices, making them essential for practice without damaging your floors. Using a hitting mat also helps reduce the risk of injury while practicing in a home environment.
Safety Netting: Setting up a netting system to catch errant shots is crucial; options like the Rukket Sports Net are reasonably priced and effective for home use. This safety measure ensures that you can practice your swing without worrying about damaging your surroundings or injuring anyone nearby.
What Software Options Are Available for the Best Home Golf Simulator Experience?
For the best home golf simulator setup, various software options can enhance the experience:
- SkyTrak: SkyTrak offers realistic ball flight data and a range of practice modes, making it a popular choice among golf enthusiasts. It provides users with the ability to play on renowned golf courses and includes features like shot analysis to help improve their game.
- TrackMan: TrackMan is a high-end simulator that uses radar technology to deliver precise data on every shot. It is favored by professional golfers and coaches for its accuracy and comprehensive analysis tools, providing feedback on swing mechanics and ball performance.
- OptiShot: OptiShot is known for its user-friendly interface and affordability, making it suitable for casual golfers. It comes with a variety of courses and allows for multiplayer experiences, enabling friends to play together virtually, which adds to the fun of home practice.
- Golf Club 2019: This software combines realistic graphics with an extensive library of real-world golf courses, allowing users to play in a highly immersive environment. It includes customizable settings and various game modes, catering to both solo players and those who enjoy competitive play.
- FSX 2020: FSX 2020 offers a highly advanced simulation experience with stunning graphics and detailed course recreations. It features a wide range of practice options, including driving ranges and putting greens, and is compatible with various launch monitors for enhanced performance tracking.
- e6 CONNECT: e6 CONNECT provides a highly interactive experience with realistic physics and graphics, focusing on both practice and game play. It includes several popular courses and customizable settings, making it suitable for serious golfers looking to refine their skills in a home environment.
Which Features Should You Look for in Golf Simulator Software?
When setting up the best home golf simulator, certain features in the software can enhance your experience significantly:
- Realistic Graphics: High-quality graphics make the virtual environment more immersive and enjoyable.
- Course Variety: A wide selection of real-world courses allows users to experience different challenges and landscapes.
- Shot Analysis Tools: Detailed metrics and feedback on your swings help to improve your game.
- Multiplayer Options: The ability to play with friends or compete against other players online adds a social element to the experience.
- Customizable Settings: Options to adjust difficulty levels, weather conditions, and course setups cater to different skill levels and preferences.
- Integration with Hardware: Compatibility with various golf simulation hardware ensures a seamless experience.
- Training Programs: Access to drills and lessons within the software aids in skill development.
Realistic Graphics: High-quality graphics are essential for immersing yourself in the game, making it feel more like actual golf. Detailed textures, realistic lighting, and accurate representations of courses contribute to a more engaging atmosphere and can help improve your focus and enjoyment during practice sessions.
Course Variety: Having a broad selection of real-world golf courses means you can experience diverse terrains and challenges without leaving home. This variety not only keeps the gameplay fresh but also allows you to practice on famous courses, enhancing your skills while enjoying iconic landscapes.
Shot Analysis Tools: Advanced shot analysis features provide important data about your swings, such as club speed, ball spin, and launch angles. This information is invaluable for identifying areas for improvement and tracking your progress over time, making it a critical component of a home golf simulator setup.
Multiplayer Options: The ability to connect with friends or compete against other players online adds a social dimension to your practice sessions. Engaging in friendly competitions can motivate you to improve and create a more enjoyable experience as you share your passion for golf.
Customizable Settings: Customizable options allow you to tailor the simulator experience to your specific needs and preferences. Whether adjusting difficulty levels or simulating different weather conditions, these settings can help accommodate varying skill levels and enhance your training sessions.
Integration with Hardware: Compatibility with various golf simulation hardware, such as launch monitors and sensors, is crucial for a seamless experience. Ensuring that the software works well with your existing equipment maximizes functionality and accuracy in tracking your performance.
Training Programs: Access to structured training programs, drills, and professional lessons within the simulator software can significantly improve your skills. These resources provide guidance and targeted practice routines, helping you to develop specific aspects of your game more effectively.
What Maintenance Practices Ensure Longevity of Your Golf Simulator Setup?
Calibration Checks: To maintain accuracy, you should recalibrate your simulator after moving it or if you notice discrepancies in the readings. This involves following the manufacturer’s instructions to ensure that the sensors and software are aligned correctly for optimal performance.
Software Updates: Golf simulator manufacturers often release updates that fix bugs, improve performance, and add new features. Regularly checking for updates and installing them will ensure that you have access to the latest technology and enhancements, making your practice sessions more enjoyable.
Hardware Inspections: Regularly checking cables, sensors, and other hardware components for wear and tear can help you catch issues early. Look for fraying wires or loose connections, as these can impact the simulator’s ability to function properly and may require replacements.
Proper Storage: If you’re not using your golf simulator for an extended period, consider covering it with a protective cover or storing it in a climate-controlled environment. This helps safeguard it against dust and extreme temperatures, which can damage sensitive electronic components.
How Often Should You Calibrate and Update Your Equipment?
Calibrating and updating your home golf simulator equipment is essential for maintaining accuracy and performance. The frequency of these tasks depends on several factors:
-
Calibration: It’s recommended to calibrate your simulator every 3 to 6 months. This ensures sensors and software are aligned for optimal performance. If you notice discrepancies in your shot data, recalibrating sooner may be necessary.
-
Software Updates: Regular updates should be performed as soon as they become available. Manufacturers often release updates to enhance performance, fix bugs, or add new features. Check for updates every month or subscribe to notifications from your software provider.
-
Equipment Checks: Conduct routine inspections of hardware components, including cameras and sensors, every month. This helps identify wear and tear that may affect performance.
-
Environmental Factors: If your setup is in a location that experiences fluctuations in temperature or humidity, recalibrate after significant changes in conditions.
Keeping a consistent schedule for calibration and updates can extend the lifespan of your equipment and improve your overall simulation experience.
Related Post: