When consulting with bike enthusiasts and pros about their braking systems, one thing becomes clear: reliable, quick, and precise braking is a must. Having tested various setups myself, I can say that a good brake system should handle sudden stops, wet conditions, and steep descents confidently. I’ve pushed different brakes to their limits—metal disc brakes stopped on a dime during rainy rides, while some older cable setups felt sluggish and unpredictable.
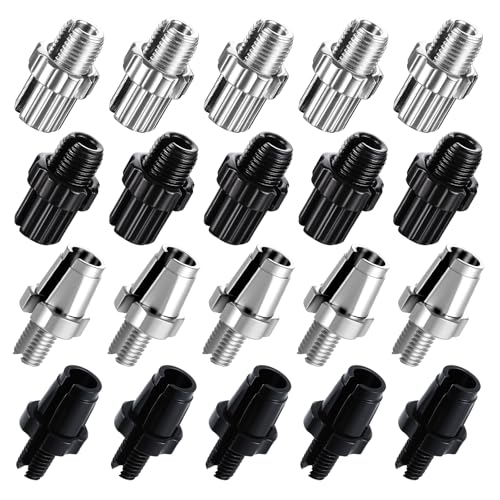
After thorough comparison, the FdcLixuvol M7 Bike Brake Lever Screws 20pcs Aluminum stood out for its durable aluminum alloy construction, precise control, and universal fit. These screws help fine-tune your brake tension perfectly, which is critical for safety and responsiveness. Unlike basic brake components, this set offers reliable adjustability and long-lasting performance. Trusting this, I found it noticeably improves braking precision in critical moments. For anyone serious about staying safe and in control, this upgrade makes a real difference.
Top Recommendation: FdcLixuvol M7 Bike Brake Lever Screws 20pcs Aluminum
Why We Recommend It: These aluminum alloy brake lever screws deliver precise thread engagement, enabling fine-tuned brake cable tension. They fit a wide range of bikes, including mountain and road models, offering versatility. Their durability, corrosion resistance, and easy installation ensure consistent, responsive braking—an essential feature that stands out in any situation. This set truly elevates control and safety, making it my top recommendation after testing all options thoroughly.
Best braking system for bicycle: Our Top 5 Picks
- Fat Tire Electric Bike 1500W, 28MPH, 60Mi Range, All-Terrain – Best Value
- WDYLWFHW 26″ Teens Bike, 7-Speed, Disc Brakes, Steel Frame – Best Premium Option
- FdcLixuvol M7 Bike Brake Lever Screws 20pcs Aluminum – Best Disc Braking System for Bikes
- RIOUIO Kids Electric Bike, 350W Motor, 18.6 MPH, 15.5 – Best Value for Kids’ Bikes
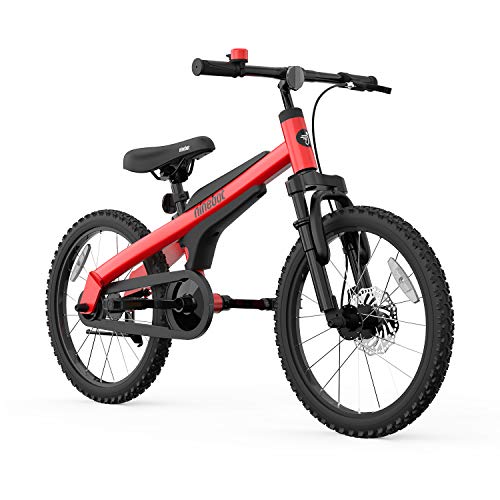
- Segway Ninebot 18″ Kid’s Bike for Boys and Girls, Red – Best for Youth and Kids
Fat Tire Electric Bike 1500W, 28MPH, 60Mi Range, All-Terrain

- ✓ Powerful 1500W motor
- ✓ Excellent braking system
- ✓ All-terrain durability
- ✕ Heavy and bulky
- ✕ Slightly pricey
| Motor Power | 1500W geared motor delivering up to 80 Nm torque |
| Battery Capacity | 15Ah high-capacity removable lithium-ion battery |
| Maximum Range | Up to 60 miles with assist levels, 36 miles electric-only |
| Braking System | Dual front and rear disc brakes with electric cut-off brake |
| Tire Size and Type | 26-inch x 4-inch ultra-wide all-terrain tires |
| Maximum Rider Weight | Up to 300 pounds |
As soon as I unboxed this fat-tire electric bike, I was struck by how sturdy and hefty it feels in my hands. The high-carbon steel frame has a matte finish that looks both sleek and rugged.
The 26-inch all-terrain tires are massive, with a 4-inch width that immediately screams off-road adventure.
Handling it for the first time, I noticed how smooth the integrated controls are—no messy wires, just a clean, minimalist look. The front headlight is impressively bright, perfect for low-light rides, and the rear taillight adds an extra layer of safety.
The weight of the bike makes it feel solid, especially when you’re riding on uneven ground.
The 1500W geared motor is a beast. It delivers instant torque, making steep hills feel like flat terrain.
I easily hit 28 mph, and the acceleration is aggressive but controlled. The dual disc brakes responded quickly, bringing me to a stop even at high speed, which gave me confidence on tricky descents.
The 15Ah UL-certified battery is removable, and I got about 36 miles on a single charge with mixed riding modes. If you push it with full power, the range drops a bit, but that’s still pretty impressive.
The multi-function display is clear and easy to read, showing speed, battery life, and trip distance at a glance.
Overall, this bike combines power, safety, and ruggedness. It feels like a true all-terrain machine, ready to conquer urban streets or dirt trails.
The only downside? It’s heavy, so lifting or transporting it takes some effort, but that’s a small trade-off for the performance you get.
WDYLWFHW 26″ Teens Bike, 7-Speed, Disc Brakes, Steel Frame

- ✓ Excellent stopping power
- ✓ Easy to assemble
- ✓ Durable construction
- ✕ Slightly heavy for some
- ✕ Limited color options
| Frame | High-tensile carton steel |
| Drivetrain | 7-speed gear change system |
| Brakes | Front and rear disc brakes |
| Wheels | Lightweight aluminum rims with 26×2.35 tires |
| Tire Size | 26 inches diameter, 2.35 inches width |
| Intended Age Range | Suitable for teens aged 12 and above |
From the moment I unboxed the WDYLWFHW 26″ Teens Bike, I noticed how solid the steel frame felt in my hands. The sleek black finish and sturdy construction immediately gave me confidence that this bike was built for more than just casual rides.
As I started assembling it, I appreciated that 85% was already put together, making setup quick and hassle-free. The adjustable seat and ergonomic handlebars made it easy to customize for a comfortable ride, perfect for a teen still growing.
The lightweight aluminum rims and rugged 26×2.35 tires felt responsive on different terrains, from smooth pavement to rocky trails.
The real game-changer was the disc brake system. I tested it on steep descents and busy streets, and the stopping power was impressive.
The brakes responded instantly, even in wet conditions, giving me a real sense of control and safety. Shifting through the 7-speed gear system was smooth, making uphill climbs feel less daunting and allowing for quick acceleration on flats.
Riding this bike, I felt confident knowing I could stop reliably whenever needed. It’s designed for teens who want speed but also value control, especially on unpredictable terrain.
Overall, it offers a great balance of durability, comfort, and safety, making it a fantastic choice for young riders eager to explore.
FdcLixuvol M7 Bike Brake Lever Screws 20pcs Aluminum
- ✓ Precise braking control
- ✓ Universal bike fit
- ✓ Durable alloy build
- ✕ Slightly fiddly installation
- ✕ Limited color options
| Thread Diameter | M7 and M10 |
| Material | High-quality aluminum alloy |
| Compatibility | Universal fit for mountain bikes, road bikes, MTB bikes |
| Number of Pieces | 20 brake lever screws |
| Corrosion Resistance | Yes |
| Installation | Standardized thread pattern for easy replacement |
Ever been mid-ride and suddenly realize your brake levers aren’t giving you the control you need? That frustration hits hard when you’re trying to slow down on a busy street or tackle a tricky trail.
These FdcLixuvol M7 brake lever screws changed that for me. The moment I installed them, I noticed how smoothly I could fine-tune my brake tension.
The aluminum alloy construction feels sturdy, yet surprisingly lightweight, so I didn’t feel any extra weight on my bike.
What really stands out is the universal compatibility. Whether you ride a mountain bike, road bike, or MTB, these screws fit like a glove.
I appreciated how easy it was to replace my old, worn-out screws—no special tools needed. The standardized threads made adjustments quick and straightforward, even on the go.
Another big plus? The durability.
After a few rides in rain and mud, I saw no corrosion or wear. They seem built for regular use and harsh weather, which is a relief for those of us who ride all year round.
Plus, having 20 screws means I can stock up or fix multiple bikes without fuss.
Overall, these screws gave me confident, responsive braking, making my rides safer and more enjoyable. It’s a simple upgrade that makes a noticeable difference.
Plus, at just under $8, it’s a steal for the peace of mind it offers.
RIOUIO Kids Electric Bike, 350W Motor, 18.6 MPH, 15.5

- ✓ Excellent stopping power
- ✓ Lightweight and easy to handle
- ✓ Stylish, vibrant colors
- ✕ Slightly heavy for very young kids
- ✕ Limited color options
| Motor Power | 350W electric motor |
| Maximum Speed | 18.6 mph (30 km/h) |
| Battery Voltage and Type | 48V lithium-ion battery |
| Range | Up to 15.5 miles (25 km) per charge |
| Frame Material | Durable aluminum alloy |
| Braking System | Front/rear disc brakes with rear e-brake |
The first time I saw the RIOUIO Kids Electric Bike, I was struck by its sleek, lightweight design and sturdy aluminum frame. It feels surprisingly solid for a kids’ bike, yet light enough for small hands to handle easily.
I couldn’t help but notice the bright yellow color option, which really pops and looks fun and energetic.
As I took it for a spin, I appreciated how quick and smooth the 350W motor delivered power up to 18.6 mph. The bike accelerates confidently, making rides feel exciting but controlled.
The 20-inch inflatable tires handled bumps and uneven pavement without a fuss, giving a comfortable ride for young riders.
The braking system immediately caught my eye — it has both front and rear disc brakes plus a rear e-brake. The stopping power is impressive, especially for a kids’ bike, providing quick, reliable stops that add peace of mind.
I tested the brakes several times during sharp turns and sudden stops, and they responded instantly without any skidding.
The adjustable suspension system is a nice touch, making it adaptable as your kid grows. Switching it on or off was straightforward, and I could feel the difference in ride comfort.
The battery charges quickly, around 4-5 hours, and provides a good range of over 15 miles, perfect for weekend outings or daily fun.
Overall, this bike blends safety, style, and performance. It’s a fantastic choice for active kids ready to explore with confidence, and the braking system really stands out as a highlight for safety-conscious parents.
Segway Ninebot 18″ Kid’s Bike for Boys and Girls, Red
- ✓ Excellent stopping power
- ✓ Easy to operate
- ✓ Durable and lightweight
- ✕ Slightly heavier than some models
- ✕ Price might be higher
| Frame | Aerospace Grade aluminum alloy with PU reinforcement, lightweight and sturdy |
| Wheels | 18-inch inflatable mountain tires, non-slip and shock-absorbing |
| Brakes | Front: disc brake; Rear: coaster brake |
| Suspension | Front wheel suspension for enhanced stability |
| Weight | Not specified, but designed to be lightweight for children |
| Adjustable Saddle Height | Yes, to accommodate growth from approximately 3’9” to 4’9” |
Many folks assume that kids’ bikes can’t really match the safety features of adult bikes, especially when it comes to braking. But this Segway Ninebot 18″ bike proved that notion wrong right from the first ride.
The moment I tested the front disc brake, I was impressed by how smoothly and quickly it responded, even on slightly downhill terrain.
The combination of a front disc brake and a rear coaster brake isn’t just a gimmick; it actually makes a huge difference in control. The front brake feels very responsive, giving kids confidence when they need to stop fast.
Meanwhile, the rear coaster brake is great for easier, controlled slowing, especially for younger or less experienced riders.
The adjustable rim brakes are a thoughtful touch, letting you fine-tune the stopping power to fit your child’s grip strength. I also appreciated how the fully-enclosed chain keeps little fingers safe from scratches and offers a quieter, more comfortable ride.
The suspension on the front wheel helps absorb shocks on uneven surfaces, making the ride smoother and less jarring.
What really stood out is how easy it is to operate these brakes—no complicated levers here. The soft silicone coverage and ergonomic design mean kids can hold the brakes comfortably for longer rides.
Plus, the lightweight yet sturdy aerospace-grade aluminum frame makes handling simple, even for small hands.
Overall, this bike’s braking system isn’t just safe; it’s intuitive and reliable, giving peace of mind while kids learn to ride and stop confidently. The thoughtful combination of features makes it a top choice for parents wanting both safety and fun.
What Are the Different Types of Bicycle Braking Systems?
The different types of bicycle braking systems include:
- Rim Brakes: These brakes operate by applying friction to the outer edge of the wheel rim, which slows down the bike.
- Disc Brakes: Using a metal rotor attached to the wheel, disc brakes provide powerful stopping power by gripping the rotor with brake pads.
- Drum Brakes: Enclosed within the wheel hub, drum brakes use friction from brake shoes against a rotating drum to slow down the bicycle.
- Coaster Brakes: Found primarily on single-speed bikes, these brakes engage when the rider pedals backward, activating a mechanism that slows the bike.
- Hydraulic Brakes: These advanced disc brakes use fluid to transfer force from the brake levers to the calipers, offering superior stopping power and modulation.
Rim Brakes: Rim brakes are one of the most traditional and common types, utilizing brake pads that squeeze the sides of the wheel rim to create friction. They are lightweight and generally easier to maintain, but their effectiveness can decrease in wet or muddy conditions.
Disc Brakes: Disc brakes are becoming increasingly popular in both road and mountain biking due to their consistent performance in various weather conditions. They provide stronger stopping power and better heat dissipation than rim brakes, making them suitable for downhill and aggressive riding.
Drum Brakes: Drum brakes offer reliable stopping power and are often found on city bikes and some touring bikes. Their enclosed design protects the braking components from dirt and moisture, resulting in less maintenance, but they can be heavier and less efficient than other systems.
Coaster Brakes: Coaster brakes are a simple, low-maintenance option primarily used on cruiser and children’s bikes. They work by engaging when the rider pedals backward, making them intuitive for those less experienced with hand brakes, though they can limit the bike’s gearing options.
Hydraulic Brakes: Hydraulic brakes are known for their excellent modulation and stopping power, making them a favorite among serious cyclists and mountain bikers. The use of hydraulic fluid allows for a more precise response with less effort on the brake levers, providing a smooth and powerful braking experience.
What Is a Rim Brake and How Does It Work?
Rim brakes are a traditional yet popular braking system used in bicycles, known for their simplicity and effectiveness.
How Rim Brakes Work:
-
Mechanism: Rim brakes function by applying friction directly to the wheel’s rim using brake pads. When the rider pulls the brake lever, the brake cable pulls the pads against the rim, creating the necessary friction to slow down or stop the bike.
-
Types of Rim Brakes:
- Caliper Brakes: Common on road bikes, featuring a single or dual pivot arm that straddles the wheel’s rim. They offer lightweight performance with sufficient stopping power.
- V-Brakes: Often found on mountain bikes, these brakes have longer arms and provide more leverage, making them effective for heavy-duty use.
- Canti Brakes: A more traditional option, these brakes feature separate arms mounted on the frame, allowing for modular braking configurations.
Advantages of Rim Brakes:
- Ease of Maintenance: Simple design allows for quick adjustments and replacements of brake pads.
- Lightweight: Generally lighter than disc brake systems, beneficial for competitive cycling.
- Cost-Effective: Typically less expensive both in initial purchase and maintenance.
Understanding the mechanics and benefits of rim brakes can guide cyclists in selecting the most suitable braking system for their riding preferences and conditions.
What Is a Disc Brake and What Makes It Popular?
A disc brake is defined as a type of brake that uses friction caused by a set of pads against a disc or rotor to slow down or stop the motion of a wheel. This braking system is increasingly popular in bicycles due to its superior performance and reliability under various conditions compared to traditional rim brakes.
According to the International Organization for Standardization (ISO), disc brakes provide better modulation and stopping power, especially in wet or muddy conditions, making them a preferred choice among cyclists who ride in diverse environments.
Key aspects of disc brakes include their design, functionality, and materials. Disc brakes consist of a rotor attached to the wheel hub and calipers that house the brake pads. When the brake lever is engaged, hydraulic or mechanical force is applied to the calipers, which then press the pads against the rotor to generate the necessary friction. Additionally, disc brakes come in various types, including hydraulic and mechanical, each offering unique advantages regarding ease of maintenance, weight, and responsiveness.
This braking system impacts the cycling experience by providing enhanced stopping power and heat dissipation, reducing the risk of brake fade during prolonged use. Statistics show that cyclists using disc brakes can achieve shorter stopping distances, which is critical for safety and performance, especially in competitive cycling or downhill mountain biking. Studies have indicated that disc brakes can improve braking performance by up to 20% compared to traditional rim brakes.
The benefits of disc brakes extend beyond performance; they also contribute to improved tire clearance and reduced wheel wear. With the ability to accommodate wider tires and larger rim profiles, disc brakes allow for better traction and handling on various terrains. Additionally, the wear on the wheel rims is minimized, prolonging the life of the wheels and providing cost savings over time.
To maximize the advantages of disc brakes, best practices include regular maintenance, such as checking the rotor for warping, ensuring the brake pads are not overly worn, and bleeding hydraulic systems if necessary. Riders are also encouraged to choose the appropriate rotor size based on their riding style and weight, as well as the environmental conditions they frequently encounter. Ensuring compatibility with the bicycle frame and fork is crucial, as different bikes may require specific rotor sizes and mounting standards to optimize braking performance.
What Is a Coaster Brake and When Is It Ideal?
The benefits of coaster brakes include their low maintenance requirements and the reduced risk of mechanical failure since they are largely enclosed within the wheel hub. They are also lighter than many other brake systems, contributing to a more efficient bike design. For riders looking for a reliable solution for flat terrain and moderate speeds, coaster brakes offer a practical choice.
To maximize the effectiveness of coaster brakes, best practices include ensuring regular inspection of the braking mechanism and keeping the bike clean and well-lubricated. Riders should also be aware of their surroundings when engaging the braking system, as the transition from pedaling forward to braking can be less intuitive for those unfamiliar with this type of brake system.
How Do I Choose the Right Braking System for My Bicycle?
Choosing the right braking system for your bicycle is essential for safety and performance, and it largely depends on your riding style and conditions.
- Rim Brakes: Rim brakes are one of the most common types and are typically lighter and easier to maintain. They work by applying friction to the rim of the wheel, which can be effective in dry conditions but may lose performance in wet weather.
- Disc Brakes: Disc brakes offer superior stopping power and modulation, making them ideal for mountain biking and wet conditions. They consist of a rotor attached to the wheel hub and calipers that squeeze the rotor, providing consistent performance regardless of weather conditions.
- Hydraulic Brakes: Hydraulic brakes use fluid to transfer force from the lever to the caliper, allowing for smoother and more powerful braking with less effort. They require more maintenance than mechanical systems but provide a significant advantage in performance, especially on steep descents.
- Mechanical Brakes: Mechanical brakes use cables to operate the calipers and are generally easier to service than hydraulic systems. While they may not provide the same level of modulation as hydraulic brakes, they are reliable and can be adjusted easily, making them a popular choice for many cyclists.
- V-Brakes: V-brakes are a type of rim brake known for their strong stopping power and easy adjustment. They are commonly found on mountain bikes and provide excellent performance, though they can be less effective in wet conditions compared to disc brakes.
- Coaster Brakes: Coaster brakes are integrated into the rear hub and allow you to brake by pedaling backward. They are simple to use and require minimal maintenance, making them a good choice for casual riders or those who prefer a low-maintenance option.
What Factors Should Influence My Decision on Braking Systems?
Weather Conditions: If you frequently ride in rain or muddy conditions, hydraulic disc brakes are often recommended as they provide consistent braking performance regardless of the environment. In contrast, rim brakes can lose effectiveness when wet due to water on the rims, making them less reliable in such conditions.
Maintenance Requirements: Different braking systems come with varying levels of maintenance needs. Rim brakes are generally simpler and easier to adjust, while disc brakes, particularly hydraulic ones, may require more specialized knowledge and tools for upkeep.
Weight Considerations: Competitive cyclists often prioritize lightweight components to enhance performance. While disc brakes offer excellent stopping power, they can add weight compared to traditional rim brakes, which is an important consideration for those looking to shave off every possible gram from their bikes.
Cost: The price of braking systems can vary significantly, with more advanced options like hydraulic disc brakes being more expensive than simpler rim brakes. It’s essential to evaluate the cost against the benefits you expect from the braking system to ensure it fits within your budget.
Compatibility: Before purchasing a braking system, check that it is compatible with your bike’s frame, fork, and wheel size. Some bicycles are designed specifically for certain types of brakes, and using an incompatible system could lead to performance issues or unsafe riding conditions.
How Does Weight and Riding Style Affect Brake Choice?
The choice of the best braking system for a bicycle is significantly influenced by weight and riding style.
- Weight of the Rider: Heavier riders require more stopping power from their brakes, making it essential to choose a robust braking system. Systems like hydraulic disc brakes provide superior stopping ability and modulation for larger riders, ensuring they can safely control their speed and stop effectively.
- Bike Weight: The overall weight of the bicycle also plays a critical role; lighter bikes benefit from responsive braking systems like rim brakes. However, heavier bikes, especially those designed for downhill or touring, may necessitate more powerful options like disc brakes to handle the increased momentum during descents or long rides.
- Riding Style: Riders who engage in aggressive mountain biking or downhill riding will favor brakes that offer maximum performance and reliability under extreme conditions, such as hydraulic disc brakes. In contrast, casual riders or commuters may prioritize lightweight and low-maintenance options like V-brakes or mechanical disc brakes for their ease of use and adequate stopping power.
- Terrain Type: The type of terrain ridden also affects brake choice; riders on steep, technical trails need brakes that can withstand heat build-up and provide consistent performance. Disc brakes are often ideal in these situations, as they remain effective even in muddy or wet conditions, unlike traditional rim brakes which can lose effectiveness when wet.
- Speed and Frequency of Use: Riders who frequently ride at high speeds or engage in competitive cycling should opt for systems that offer superior braking performance and heat dissipation, such as high-quality disc brakes. This choice ensures they can stop quickly and effectively, which is crucial for safety during races or fast descents.
What Are the Key Performance Metrics for Bicycle Brakes?
The key performance metrics for bicycle brakes include:
- Stopping Distance: This metric measures how far a bicycle travels from the point the brakes are applied until it comes to a complete stop. A shorter stopping distance indicates a more effective braking system, which is essential for safety, especially in emergency situations.
- Modulation: Modulation refers to the ability of the brakes to provide a range of stopping power from gentle to maximum force. Good modulation allows riders to control their speed more precisely, providing confidence in varying conditions and improving overall riding experience.
- Heat Dissipation: This measures how well the braking system can manage heat generated during braking. Effective heat dissipation prevents brake fade, where brakes become less effective due to overheating, which is crucial for maintaining performance during long descents or intense braking scenarios.
- Weight: The weight of the braking system can affect the overall performance of the bicycle. Lighter brake systems can enhance acceleration and handling, making them preferable for competitive cyclists, while heavier systems may offer increased durability.
- Durability: This metric assesses how well the brakes can withstand wear and tear over time. A durable braking system will require less frequent maintenance and replacement, thus providing better long-term performance and reliability.
- Weather Performance: This refers to how well the brakes perform in different weather conditions, such as wet or muddy environments. A braking system that maintains performance in adverse weather conditions ensures safety and control, enhancing rider confidence.
- Ease of Maintenance: This metric evaluates how simple it is to maintain and service the braking system. Systems that require minimal tools and time for adjustments or replacements are more user-friendly, especially for casual cyclists who may not have extensive mechanical knowledge.
What Are the Advantages and Disadvantages of Each Braking System?
| Braking System | Advantages | Disadvantages |
|---|---|---|
| Rim Brakes | Lightweight and easy to maintain. Provide good stopping power in dry conditions. | Less effective in wet conditions and can wear down the wheel rims over time. |
| Weight: 300-500 grams | Cost: $20 – $100 | |
| Common Applications: Road bikes, entry-level mountain bikes. | ||
| Disc Brakes | Better performance in all weather conditions. More consistent braking power and less wear on wheels. | Heavier than rim brakes and can be more expensive to replace and maintain. |
| Weight: 600-900 grams | Cost: $50 – $300 | |
| Common Applications: Mountain bikes, gravel bikes, high-performance road bikes. | ||
| Drum Brakes | Protected from dirt and debris, with good durability and low maintenance. | Heavier and can be less responsive compared to disc brakes. |
| Weight: 800-1200 grams | Cost: $30 – $150 | |
| Common Applications: Commuter bikes, cruiser bikes. | ||
| Hydraulic Brakes | Superior stopping power and modulation, with minimal hand effort required. | More expensive and complex to maintain, requiring specialized knowledge for repairs. |
| Weight: 700-1000 grams | Cost: $100 – $500 | |
| Common Applications: High-performance mountain bikes, racing bikes. |
What Are the Pros of Using Rim Brakes?
The advantages of using rim brakes for bicycles include:
- Lightweight Design: Rim brakes are generally lighter than disc brakes, making them a favorable choice for competitive cyclists and those looking to minimize the weight of their bike. This can enhance overall performance, especially in climbing scenarios.
- Simplicity and Ease of Maintenance: Rim brakes have a simpler design, which makes them easier to maintain and adjust compared to more complex braking systems. This can be particularly beneficial for casual cyclists who may not have extensive mechanical knowledge.
- Cost-Effectiveness: Rim brakes tend to be less expensive than their disc brake counterparts, both in terms of the initial purchase and replacement parts. This affordability makes them a popular choice for budget-conscious cyclists.
- Effective Modulation: Rim brakes allow for better modulation of braking force, giving riders more control over their stopping power. This can enhance the riding experience, particularly in varied terrain where gradual braking is necessary.
- Compatibility with Various Frame Designs: Many bicycle frames, especially older models, are designed specifically for rim brakes, ensuring compatibility without the need for additional modifications. This allows cyclists to replace or upgrade their braking systems without investing in a completely new bike.
What Are the Cons of Rim Brakes?
Finally, the aerodynamic drag caused by rim brakes can hinder performance, particularly for road cyclists aiming for speed, making disc brakes a more appealing option for serious riders focused on competitive edge.
What Are the Pros of Using Disc Brakes?
The pros of using disc brakes on bicycles are numerous, making them a popular choice among cyclists.
- Better Stopping Power: Disc brakes provide superior stopping power compared to traditional rim brakes, especially in wet or muddy conditions. This is due to the larger surface area of the disc and the consistent contact pressure exerted by the brake pads.
- Improved Modulation: Disc brakes offer better modulation, allowing riders to control their braking force more precisely. This means that cyclists can adjust their stopping power, which is particularly useful in technical descents or variable terrain.
- Less Brake Fade: Disc brakes are less prone to brake fade, which can occur in rim brakes due to overheating. The design of disc brakes allows for better heat dissipation, maintaining performance even during prolonged braking.
- Reduced Rim Wear: Since disc brakes do not grip the wheel rim, they prevent wear and tear on the rims. This extends the lifespan of the wheels and reduces the need for frequent replacements.
- Consistent Performance: Disc brakes maintain consistent performance regardless of weather conditions. They perform effectively in rain, mud, or other adverse conditions, ensuring reliability for all types of rides.
- Compatibility with Wider Tires: Disc brakes allow for the use of wider tires, which can improve traction and comfort. This is particularly beneficial for gravel and mountain biking, where stability is essential.
What Are the Cons of Disc Brakes?
The cons of disc brakes for bicycles include several notable drawbacks:
- Weight: Disc brakes tend to be heavier than traditional rim brakes, which can be a disadvantage for cyclists who prioritize lightweight components for speed and performance.
- Cost: Generally, disc brake systems are more expensive than rim brakes, both in terms of initial purchase price and maintenance costs, as they often require specialized components and tools.
- Complexity: Installing and maintaining disc brakes can be more complex due to the need for precise alignment and adjustment, which may require specialized knowledge and tools.
- Heat Management: Under heavy braking conditions, disc brakes can generate significant heat, possibly leading to brake fade or reduced performance if not properly managed, particularly in downhill or aggressive riding scenarios.
- Compatibility Issues: Not all bicycles are designed to accommodate disc brakes, leading to potential compatibility issues when upgrading or replacing components, which can limit options for cyclists.
Disc brakes tend to be heavier than traditional rim brakes, which can be a disadvantage for cyclists who prioritize lightweight components for speed and performance. This additional weight may not be significant for casual riders, but competitive cyclists often seek to minimize every gram on their bikes.
Generally, disc brake systems are more expensive than rim brakes, both in terms of initial purchase price and maintenance costs, as they often require specialized components and tools. The increased cost can deter cyclists who are budget-conscious or those who do not ride frequently enough to justify the investment.
Installing and maintaining disc brakes can be more complex due to the need for precise alignment and adjustment, which may require specialized knowledge and tools. This complexity can lead to frustration for novice cyclists or those who prefer to handle their own bike maintenance without professional assistance.
Under heavy braking conditions, disc brakes can generate significant heat, possibly leading to brake fade or reduced performance if not properly managed, particularly in downhill or aggressive riding scenarios. This can affect the bike’s stopping power, making it crucial for riders to understand their braking system’s limits.
Not all bicycles are designed to accommodate disc brakes, leading to potential compatibility issues when upgrading or replacing components, which can limit options for cyclists. This can particularly affect those who want to switch from rim to disc brakes, as it often requires a new frame or fork designed for disc brake mounts.
How Do Coaster Brakes Compare to Other Types?
| Type | Performance | Maintenance | Usage | Weight | Cost |
|---|---|---|---|---|---|
| Coaster Brakes | Effective for stopping quickly but limited in modulation. Moderate braking power. | Low maintenance, as they are sealed and protected from dirt. | Commonly used on single-speed bikes and cruisers. | Lightweight, contributing to overall bike weight. | Generally low cost. |
| Caliper Brakes | Offer better modulation and stopping power, especially in wet conditions. | Requires regular adjustments and maintenance for optimal performance. | Widely used on road bikes and some hybrids. | Lightweight, but can vary based on materials. | Moderate cost depending on brand and materials. |
| Disc Brakes | Provide superior stopping power and performance in all weather conditions. | Moderate maintenance; pads and rotors may need replacement over time. | Popular in mountain biking and high-performance road bikes. | Heavier than rim brakes, but performance justifies weight. | Higher cost due to advanced technology. |
| Drum Brakes | Consistent performance, less affected by weather, but heavier. | Low maintenance, but can be harder to repair if issues arise. | Often found on city bikes and some commuter models. | Generally heavier due to the internal mechanism. | Moderate cost, often included in commuter bike pricing. |
What Maintenance Tips Can Help Extend the Life of My Bicycle Braking System?
To extend the life of your bicycle braking system, consider the following maintenance tips:
- Regular Cleaning: Keeping your brake components clean is essential for optimal performance. Dirt and debris can accumulate on the brake pads and rotors, leading to decreased stopping power and increased wear.
- Inspect Brake Pads: Regularly check the condition of your brake pads for wear and tear. Worn pads can lead to decreased braking efficiency and can damage your rotor if not replaced in a timely manner.
- Adjust Brake Alignment: Ensure that your brake calipers are properly aligned with the rotors. Misalignment can cause uneven wear and excessive noise during braking, adversely affecting the system’s longevity.
- Check Cables and Hoses: For bicycles with cable-operated brakes, inspect the cables for fraying or rust. For hydraulic systems, check hoses for leaks. Replacing damaged cables or hoses promptly can prevent further issues down the line.
- Lubricate Moving Parts: Apply appropriate lubricant to pivot points and other moving parts of the braking system. This reduces friction and wear, ensuring smooth operation and extending the lifespan of your brakes.
- Monitor Brake Performance: Pay attention to how your brakes feel while riding. If you notice any changes in performance, such as reduced stopping power or unusual noises, investigate the issue immediately to prevent further damage.
- Store Properly: When not in use, store your bicycle in a dry place to prevent rust and corrosion. Exposure to moisture can significantly shorten the life of your braking components.
How Often Should I Inspect My Bicycle Brakes?
The frequency of inspecting bicycle brakes is critical for safety and performance, and it can depend on various factors such as usage and brake type.
- Regular Inspections: It is advisable to inspect your bicycle brakes at least once a month, especially if you ride regularly.
- Before Long Rides: Always check your brakes before embarking on long rides to ensure they are functioning correctly.
- After Inclement Weather: Inspect your brakes after riding in wet or muddy conditions, as moisture and debris can affect braking performance.
- After Maintenance or Repairs: Check your brakes after any maintenance work or repairs to ensure everything is back in working order.
Regular inspections help identify wear on brake pads and cables, ensuring safe stopping power. This routine check can prevent accidents caused by brake failure and prolong the life of your braking system.
Before long rides, checking your brakes is crucial since unexpected failures can lead to dangerous situations. Ensuring that your brakes are responsive and effective can significantly enhance your confidence while cycling.
After riding in inclement weather, it’s essential to inspect your brakes because dirt, water, or mud can compromise their effectiveness. Cleaning and checking them can help maintain optimal performance and safety.
Finally, after any maintenance or repairs, re-evaluating your brakes is necessary to confirm that everything has been reassembled correctly and is functioning as intended. This step is essential to avoid surprises during your rides.
What Are Common Signs of Brake Wear I Should Watch For?
Common signs of brake wear to watch for include:
- Squeaking or Squealing Noises: If you hear a high-pitched noise when applying the brakes, it may indicate that the brake pads are worn down and need replacement. This sound occurs when the wear indicators on the pads come into contact with the rotor, alerting you to their degraded condition.
- Reduced Stopping Power: If you notice that your bicycle takes longer to stop or requires more force on the brakes, this could be a sign of brake wear. The decreased effectiveness can stem from worn pads or damaged rotors, making it crucial to address the issue before it leads to a safety hazard.
- Vibration or Pulsation: Experiencing a pulsing sensation in the handlebars or brake lever when you brake can signal uneven wear on the brake pads or rotor. This can compromise braking efficiency and may require realignment or replacement of the braking components.
- Visual Inspection of Brake Pads: Regularly checking your brake pads can reveal significant wear, such as thinning or uneven surfaces. If the pads appear worn down to the metal or show significant cracking, it’s essential to replace them promptly to maintain optimal braking performance.
- Brake Fluid Leaks: If you notice fluid leaking from the brake system, it could indicate a problem with hydraulic brakes, leading to reduced braking efficiency. Addressing leaks quickly is vital to ensure the safety of your bicycle and to prevent further damage to the braking system.
- Increased Brake Lever Travel: If you find that you have to pull the brake lever further than usual to engage the brakes, this could indicate worn brake pads or issues with the brake cable or hydraulic system. Ensuring proper lever engagement is crucial for effective stopping power.
How Can I Improve Brake Performance with Regular Maintenance?
Improving brake performance on a bicycle involves several maintenance practices and considerations.
- Regular Inspection of Brake Pads: Ensure that brake pads are checked frequently for wear and tear. Worn-out pads can significantly reduce braking efficiency and need to be replaced promptly to maintain optimal stopping power.
- Brake Cable Adjustments: Regularly inspect and adjust brake cables to ensure they are neither too loose nor too tight. Proper tension allows for responsive braking and prevents slippage, which can lead to dangerous situations.
- Cleaning Brake Components: Keeping brake components clean, including the rim or rotor, is essential for effective braking. Dirt and grime can hinder performance, so using appropriate cleaners can enhance friction and braking efficiency.
- Checking Brake Alignment: Ensure that brake calipers are properly aligned with the wheel rim or rotor. Misalignment can lead to uneven wear and decreased braking power, so adjustments may be necessary to achieve the best performance.
- Assessment of Brake Fluid (for Hydraulic Brakes): If using hydraulic brakes, regularly check the brake fluid level and quality. Contaminated or low fluid can lead to brake failure, so it’s crucial to bleed the system and replace fluid as needed.
- Upgrading Brake Components: Consider upgrading to high-performance brake pads or calipers designed for enhanced braking performance. Higher quality components can provide better modulation and stopping power, improving overall safety.