Standing in pouring rain with sensitive electronics ready to get wet, I realized why a solid kayak wiring kit really matters. After testing several setups, I know how frustrating loose, water-prone cables can be. That’s where a high-quality thru-hull wiring kit becomes your best friend—keeping everything secure, water-resistant, and clutter-free.
From my experience, the best kits combine marine-grade materials with flexible inserts to customize cable sizes and securely seal old holes. The ChangTa Through Hull Wiring Kit for Kayaks, Thru-Hull stood out because it offers eight rubber inserts with common hole sizes, plus the ability to adapt to varying cables. It’s durable, easy to install, and looks neat inside the hull. Compared to others, it provides better customization options and a clean, professional finish. Trust me, if you want longevity and flexibility, this kit is a total game-changer.
Top Recommendation: ChangTa Through Hull Wiring Kit for Kayaks, Thru-Hull
Why We Recommend It: This kit offers the most comprehensive set of rubber inserts, including blank options to drill custom holes, plus high-quality marine-grade materials for durability. Its customizable design easily fits different cable sizes and helps prevent water intrusion, making it ideal for serious kayak anglers or adventurers.
Best kayak wiring: Our Top 5 Picks
- ChangTa Through Hull Wiring Kit for Kayaks, Thru-Hull – Best Value
- JSP Manufacturing Through Hull Wiring Kit for Kayaks, – Best Premium Option
- Through Hull Wiring Kit for Kayaks and Fish Finders – Best kayak wiring for electronics
- EDSRDPLT 1003 Through Hull Wiring Kit for Installs of Fish – Best kayak wiring accessories
- Through Hull Wiring Kits EMS-1001 for Device Battery – Best kayak wiring kits
ChangTa Through Hull Wiring Kit for Kayaks, Thru-Hull

- ✓ Durable marine-grade build
- ✓ Easy to install and customize
- ✓ Keeps wiring neat and water-resistant
- ✕ Slightly more complex than basic kits
| Material | Marine-grade high-quality rubber, nylon grommets, and hardware |
| Hole Sizes Compatibility | Includes 8 rubber inserts with common hole sizes, customizable with blank inserts |
| Number of Cable Passages | Supports single or multiple wires, with options for varying cable sizes |
| Water Resistance | Designed to keep wiring water-resistant and protected within the hull |
| Application Compatibility | Suitable for use with kayak accessories such as fish finders, transducers, lighting, motors, and batteries |
| Package Contents | 8 rubber inserts, 4 blank inserts, 2 nylon grommets, 2 hardware sets |
As soon as I opened the package, I was struck by how solid and well-made this wiring kit feels in hand. The high-quality marine-grade materials give it a reassuring heft, and the smooth edges suggest it’s built to last even in tough water conditions.
Installing it was surprisingly straightforward. The rubber inserts fit snugly into the hull, and I appreciated the versatility of the blank inserts, which let me customize the hole sizes for different cables.
The nylon grommets added an extra layer of water resistance, preventing any leaks or corrosion.
What really stood out was how clean the wiring looked once installed. The kit does a great job of hiding the cables inside the hull, which keeps my kayak looking sleek and avoids clutter.
Plus, the hardware feels sturdy, so I don’t worry about it loosening over time.
Handling multiple wires or different cable sizes was a breeze, thanks to the variety of inserts included. Whether I needed to run a fish finder, transducer, or lighting, everything fit neatly through the hull.
The flexibility of the blank inserts means I can adapt or block off old holes without hassle.
Overall, this kit offers a reliable, water-resistant solution that simplifies wiring in tight spaces. It’s a small upgrade with a big impact on keeping my kayak organized and protected from water damage.
For the price, it’s a smart choice for any kayak enthusiast looking to upgrade their wiring setup.
JSP Manufacturing Through Hull Wiring Kit for Kayaks,
- ✓ Easy to customize
- ✓ Seals well against water
- ✓ Compatible with popular pods
- ✕ Short screws for thick hulls
- ✕ Slightly pricey
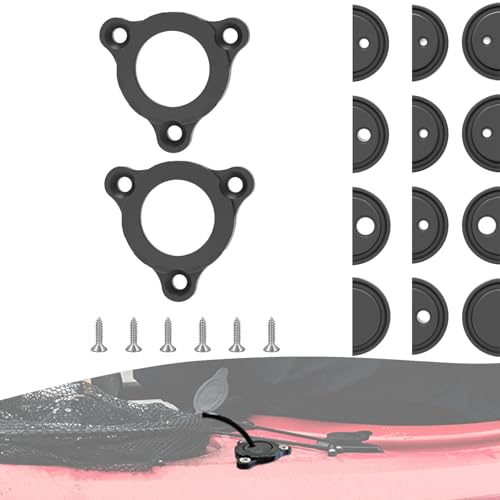
| Material | Black plastic (likely durable polymer or rubber) |
| Number of Grommets | 4 |
| Rubber Inserts | 12 with 3 different hole sizes |
| Blank Inserts | 4 |
| Compatibility | Suitable for most kayak styles, boats, yachts, and compatible with popular removable pods like Bonafide Dry Pod and Wilderness Systems Flex Pod |
| Included Screws | 8 |
After finally snagging the JSP Manufacturing Through Hull Wiring Kit for my kayak, I was eager to see if it truly made wiring accessories easier. The first thing I noticed is how well the kit’s rubber inserts and grommets fit snugly into my hull’s holes, creating a clean, professional look.
The variety of insert sizes really stands out. I was able to customize my setup easily—whether I needed a single wire for my fish finder or multiple cables for lighting and transducers.
Drilling extra holes with the blank inserts felt simple, giving me full control over my wiring layout.
The kit’s black color blends seamlessly with my kayak’s hull, and I appreciate that it’s made in the USA—feels like good quality. The screws are sturdy, and the rubber components hold tight without any leaks or wiggle.
What I really like is how versatile this kit is. It works with popular pods like the Bonafide Dry Pod or Wilderness Systems Flex Pod, which is a huge plus.
Plus, the design allows me to swap out or add wires later without drilling new holes, saving me time and hassle.
On the downside, the included screws are a bit short if you’re working with thicker hull walls. Also, the kit is a little pricier than some generic options, but the quality justifies it in my opinion.
Overall, this kit makes wiring upgrades straightforward and neat. It’s a solid buy if you want a reliable, customizable solution for your kayak accessories.
Through Hull Wiring Kit for Kayaks and Fish Finders
- ✓ Easy to install
- ✓ Water-resistant fittings
- ✓ Durable marine-grade build
- ✕ Requires precise hole size
- ✕ Limited to hulls up to 1/2 inch thick
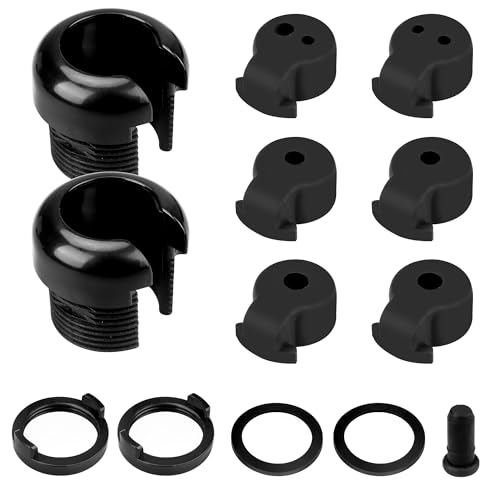
| Material | Marine-grade durable plastic with smooth edges |
| Fitting Sizes | Compatible with cables from 1/8 inch to 5/16 inch diameter |
| Installation Hole Diameter | 1-3/8 inches (35mm) |
| Hull Thickness Compatibility | Up to 1/2 inch (12.7mm) |
| Number of Fittings Included | 2 water-resistant fittings |
| Intended Use | Running wiring for fish finders, transducers, lighting, motors, and batteries inside kayak hulls |
The moment I slid the through hull wiring fitting into my kayak’s hull, I was impressed by how snug and sturdy it felt. The marine-grade construction instantly gave me confidence that it would handle water exposure and rough handling.
Fitting it through a 1-3/8 inch hole, I appreciated how well the kit sealed around the cables. The water-resistant fittings kept everything tight, preventing any leaks or water intrusion.
It’s clear this kit is designed for durability, especially with the smooth edges that won’t damage cables or hulls.
Running my fish finder and transducer wires inside the hull felt cleaner than my previous setup. No more tangled cables or tripping hazards on deck.
Plus, the six different fittings easily accommodated cables from 1/8 to 5/16 inch, making installation flexible.
What I really liked was how the fittings snugly fit onto my transducer cable, keeping it water-resistant and secure. It’s a simple upgrade that makes a big difference in protecting sensitive electronics.
Plus, the kit’s compatibility with popular kayak pods is a huge bonus.
Installation was straightforward, and I appreciated that it’s built to last with high-quality materials. For anyone wanting a neat, water-tight wiring solution, this kit ticks all the boxes.
It’s a small investment for a much cleaner, safer kayak setup.
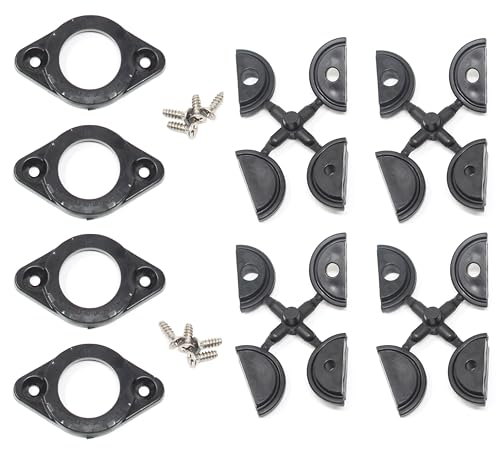
EDSRDPLT 1003 Through Hull Wiring Kit for Installs of Fish
- ✓ Easy to install
- ✓ Durable marine-grade materials
- ✓ Keeps cables organized
- ✕ Limited to specific hole sizes
- ✕ Might need extra sealing for saltwater
| Material | Rubber and high-quality plastic |
| Compatibility | Most styles of kayaks, boats, and yachts |
| Hole Sizes Supported | Up to 10 rubber inserts in common sizes, plus 2 blank inserts |
| Durability | Designed to withstand saltwater, UV rays, and harsh marine conditions |
| Installation Components | Rubber inserts, nylon grommets, screws included |
| Price | $8.99 |
Many people assume that wiring a kayak for fish finders, lights, or motors is a straightforward task, just some drilling and plugging in. But I’ve found that without the right setup, those cables can quickly turn into a tangled mess, snagging on gear or creating tripping hazards.
This EDSRDPLT Through Hull Wiring Kit instantly changed the game for me. It’s crafted with durable rubber and high-quality plastic, which means it can handle the harsh marine environment—salt, UV rays, you name it.
I was impressed by how well it fit into most kayak styles, thanks to the versatile rubber inserts and nylon grommets.
Installing it was surprisingly simple. Everything you need—rubber inserts, grommets, screws—is included.
I appreciated the adjustable hole sizes, which let me seal old openings or create a perfect fit for different cables. It’s a neat solution that keeps the wiring inside the hull, making my kayak look cleaner and more professional.
What really stood out was how much safer and more organized my setup feels. No more cables running loose, which means fewer trips or accidental pulls.
Plus, the kit’s black finish blends nicely, giving my kayak a sleek look.
At just $8.99, it’s a small investment for a big upgrade in safety and aesthetics. Whether you’re installing a fish finder or lighting, this kit makes wiring hassle-free and reliable.
Through Hull Wiring Kits EMS-1001 for Device Battery

- ✓ Easy to install
- ✓ Waterproof and durable
- ✓ Versatile rubber sizes
- ✕ Slightly limited to certain kayak models
| Material | Nylon grommets and rubber inserts |
| Rubber Insert Sizes | Five different hole diameters (specific sizes not provided) |
| Number of Grommets | 2 nylon grommets |
| Number of Rubber Inserts | 10 rubber inserts |
| Additional Components | 2 blank inserts and 4 screws |
| Intended Cable Diameter Range | Compatible with varying cable sizes due to multiple rubber insert sizes |
After finally getting my hands on the Through Hull Wiring Kit EMS-1001, I was eager to see if it could handle the mess of cables I’ve been avoiding inside my kayak. The first thing I noticed is how compact and straightforward the kit is—it feels sturdy, and the rubber inserts are well-made.
I appreciated the variety of sizes included; it makes customizing for different cables a breeze.
Installing it was surprisingly simple, thanks to the clear instructions. I chose the rubber inserts for my transducer and lighting wires, and they fit snugly without any fuss.
The nylon grommets help keep everything waterproof, which is a huge plus during my muddy, rainy outings. The screws felt solid, giving me confidence that the cables would stay protected in rough conditions.
What really stood out is how clean my kayak looks now—no more tangled cables dangling inside or outside. It’s a smart solution for hiding wires and maintaining that sleek, professional look.
Plus, the flexibility to drill different hole sizes means I can adapt it for future accessories without buying new parts.
If you’re into DIY or just want a reliable way to keep your kayak’s wiring neat and waterproof, this kit delivers. It’s a small investment that makes a noticeable difference in convenience and durability on the water.
I can see this being a game-changer for anyone tired of messy, exposed wiring.
What Is Kayak Wiring and Why Is It Important?
Benefits of investing in the best kayak wiring include enhanced safety, improved functionality, and increased durability of electrical systems. Users can enjoy peace of mind knowing that their systems are less likely to fail, thereby maximizing their time on the water. Furthermore, quality wiring can add value to a kayak, making it more appealing on the resale market.
Solutions and best practices for optimal kayak wiring involve selecting high-quality, marine-specific components and ensuring that all connections are watertight. Regular maintenance checks should be performed to inspect for wear, corrosion, or loose connections. Users should also consider utilizing modular wiring systems that allow for easy upgrades or repairs without needing to overhaul the entire setup. By adhering to these best practices, kayak enthusiasts can ensure a reliable and safe experience on the water.
What Are the Different Types of Kayak Wiring Available?
When considering the best kayak wiring options, several types are available depending on the desired functionality and convenience for paddlers.
-
Electric Wiring Kits: Designed for integrating electric components like lights, fish finders, or motors into kayaks. These kits usually come with pre-cut wiring, connectors, and a circuit breaker for safety.
-
LED Light Wiring: Ideal for improving visibility on water during low-light conditions. This wiring typically involves flexible strips that can be adhered to the kayak and powered by a small battery or the kayak’s battery system.
-
Fish Finder Wiring: Specifically intended for connecting electronics like sonar and GPS units. These wires are often waterproof and designed to handle outdoor elements, ensuring reliable performance while fishing.
-
Battery Installation Wiring: Used for setting up and securing battery systems within the kayak. They often include connectors to facilitate easy disconnection and maintenance, and are typically made from durable materials to withstand marine environments.
Choosing the right type of kayak wiring depends on the individual needs and intended use of the kayak, whether for recreational paddling, fishing, or night navigation.
How Do Standard and Waterproof Wiring Compare?
| Aspect | Standard Wiring | Waterproof Wiring |
|---|---|---|
| Durability | Less resistant to moisture; can corrode over time. | Highly resistant to moisture; designed to withstand harsh conditions. |
| Cost | Generally lower cost; more budget-friendly. | Higher initial cost; investment for long-term use. |
| Application | Suitable for indoor or dry environments. | Ideal for outdoor use, especially in wet environments. |
| Maintenance | Requires more frequent checks and replacements. | Lower maintenance due to enhanced protection against elements. |
| Weight | Generally lighter, making it easier to handle. | May be heavier due to additional protective materials. |
| Flexibility | More flexible; easier to install in tight spaces. | Less flexible; designed for durability over bendability. |
| Temperature Resistance | Limited resistance to extreme temperatures; may degrade. | Better resistance to temperature fluctuations; suitable for various climates. |
What Should You Consider When Selecting Kayak Wiring?
When selecting the best kayak wiring, several factors should be considered to ensure safety, functionality, and compatibility.
- Wire Gauge: The wire gauge determines the thickness of the wire, which affects its current carrying capacity. For kayak wiring, a lower gauge number (e.g., 14 or 16) is preferable as it can handle higher currents, making it suitable for powering devices such as fish finders or lights.
- Material: The type of material used in wiring can impact performance and durability. Copper wiring is commonly recommended due to its excellent conductivity and flexibility, while tinned copper is ideal for marine applications because it resists corrosion from saltwater.
- Insulation Type: The insulation protects the wire from damage and environmental factors. Look for wires with high-quality insulation materials like PVC or polyethylene that can withstand moisture, UV exposure, and abrasion, ensuring longevity in a kayak environment.
- Length of Wire: Consider the length of the wire needed for your specific setup. Too short a wire can restrict movement or create tension, while too long a wire can lead to unnecessary clutter and potential signal loss, especially in cases of low-voltage applications.
- Connector Type: The type of connectors used can significantly affect the reliability of your wiring setup. Choose connectors that are waterproof and secure, such as marine-grade connectors, to prevent corrosion and ensure a solid connection even in wet conditions.
- Voltage Rating: Ensure the wiring is rated for the voltage of your kayak’s electrical system. Most fishing kayaks operate on a 12V system, so selecting wiring that can handle this voltage without overheating is crucial for safety and efficiency.
- Installation Ease: Consider how easy the wiring will be to install and if it comes with clear instructions. Simple installation can save time and potential frustration, especially for those who may not have extensive electrical experience.
- Compatibility: Ensure that the wiring you select is compatible with the devices you plan to use. Check the manufacturer’s specifications of your electronics to confirm the wire gauge and type needed for optimal performance.
How Does the Gauge and Thickness Affect Performance?
The gauge and thickness of kayak wiring play a crucial role in determining performance, reliability, and overall functionality.
-
Gauge: Lower gauge numbers indicate thicker wires, which can handle more current and provide better conductivity. For instance, 10-gauge wire can support higher loads and is ideal for installations with multiple accessories, such as lights and fish finders. In contrast, a higher gauge like 16 may be suitable for lighter electronics but can lead to voltage drops and reduced efficiency in high-load situations.
-
Thickness: The thickness of the wiring not only affects conductivity but also its flexibility and ease of installation. Thicker wires can be less flexible, making them challenging to route through tight spaces in a kayak. Conversely, thinner wires are more manageable but may not support all necessary electronic equipment efficiently.
Choosing the appropriate gauge and thickness is essential for ensuring that your kayak’s electronic systems operate safely and effectively, reducing the risks of overheating and electrical failures while optimizing overall system performance.
Why Is Durability Crucial in Kayak Wiring?
Durability is crucial in kayak wiring because it ensures the electrical components can withstand harsh environmental conditions, such as water exposure, UV rays, and physical impacts, which are common in marine environments.
According to the American Boat and Yacht Council (ABYC), wiring used in marine applications must be resistant to corrosion and abrasion to prevent failure and ensure safety. This is particularly important for kayaks, which are often exposed to saltwater, fresh water, and fluctuating temperatures that can degrade inferior wiring materials.
The underlying mechanism of durability in kayak wiring is tied to the materials used and their construction. High-quality marine wiring typically features tinned copper conductors, which resist corrosion better than standard copper. Additionally, insulation made of materials like heat-shrink tubing and UV-resistant polymers protects against wear and tear. When wiring fails due to environmental stressors, it can lead to electrical malfunctions, potentially compromising the kayak’s safety and performance. Thus, investing in durable wiring is essential for maintaining the functionality and longevity of electrical systems in kayaks.
What Are the Common Installation Mistakes to Avoid?
Common installation mistakes to avoid when wiring a kayak include:
- Using the Wrong Gauge Wire: Choosing a wire gauge that is too thin can lead to overheating and voltage drop, while a wire that is too thick can be unnecessarily heavy and cumbersome. It’s crucial to select the appropriate gauge based on the amperage requirements of your kayak’s electrical components.
- Poor Connections: Failing to make solid connections can result in intermittent power loss or complete failure of the electrical system. Ensure that all connections are secure, using soldering or quality connectors to prevent corrosion and maintain a reliable electrical pathway.
- Ignoring Waterproofing: Electrical components in a kayak are exposed to water, so neglecting to waterproof connections can lead to short-circuits and component failure. Use heat-shrink tubing and marine-grade sealants to protect against moisture intrusion.
- Not Planning the Wiring Layout: A haphazard wiring layout can lead to tangled wires and make troubleshooting difficult. Plan the routing of wires before installation, ensuring they are neatly organized and secured to prevent wear and damage during use.
- Overloading Circuits: Connecting too many devices to a single circuit can cause overheating and failure of the wiring system. Always check the power requirements of your devices and ensure that they do not exceed the capacity of the circuit.
- Neglecting Fuse Installation: Skipping the installation of fuses can put your kayak’s electrical system at risk in case of a short circuit or overload. Always incorporate fuses appropriate for the amperage of your devices to protect against potential damage.
- Failing to Test the System: Many installation issues can be avoided by thoroughly testing the electrical system before taking the kayak out. Conduct tests to ensure all components are functioning as expected, checking for any issues that need addressing prior to use.
What Best Practices Should Be Followed for Successful Kayak Wiring?
Best practices for successful kayak wiring ensure safety, functionality, and ease of use.
- Plan Your Wiring Layout: Before starting, sketch a layout of your wiring system to determine the best route for cables and connections. This helps avoid potential issues such as interference with other equipment or damage from water exposure.
- Use Marine-Grade Components: Opt for marine-rated wires, connectors, and switches to withstand harsh marine environments. These components are designed to resist corrosion and damage from saltwater and UV exposure, enhancing the longevity of your wiring system.
- Secure Connections: Ensure that all wiring connections are tightly secured and waterproofed. Using heat shrink tubing or waterproof connectors can prevent water ingress, which could lead to short circuits or equipment failure.
- Fuse Protection: Incorporate fuses into your wiring system to protect against overloads and short circuits. This safety measure can prevent damage to your electronic devices and reduce the risk of fire hazards.
- Test Your System: After installation, thoroughly test your wiring system before heading out on the water. Check for any loose connections or malfunctioning components to ensure everything operates correctly and safely during a kayaking trip.
- Maintain Regular Checks: Regularly inspect your wiring for signs of wear, corrosion, or damage. Performing routine maintenance ensures that your wiring system remains reliable and functional over time, allowing for a safer kayaking experience.